How to Draw an Anime Panda Girl Step by Step
This tutorial shows how to draw an anime panda girl or to be more precise an anime girl wearing a panda hoodie in fifteen steps.
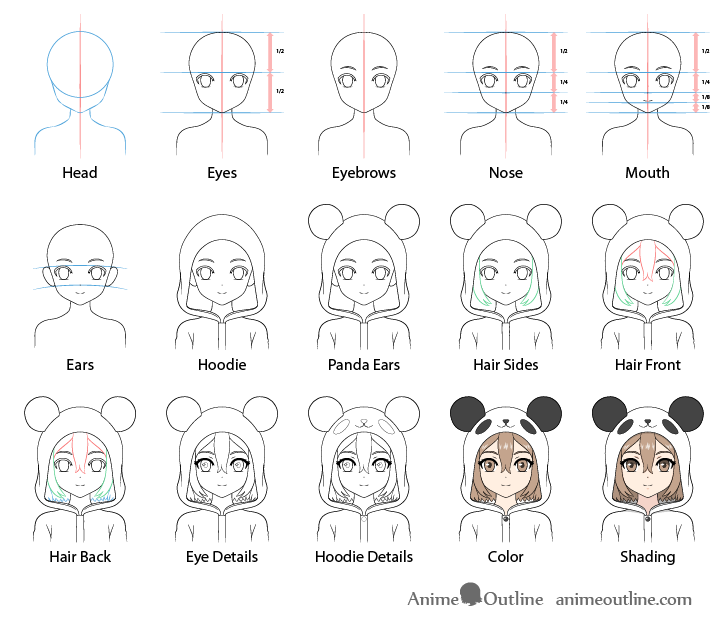
You can see a preview of the drawing stages for the panda girl in the image above.
Unlike the animal girls in some other tutorials here on AnimeOutline the “panda girl” will simply be wearing a panda hoodie instead of having actual animal features. The reason for this is that it also tends to be the trend in anime and manga.
If you’ve done some of the other similar tutorials on this site a lot of the initial steps will probably be familiar to you. However, there are also things that are more specific to this tutorial so be sure to follow along carefully.
If you are going to be drawing using pencil and paper start with light lines as you will need to erase certain parts in some of the steps. The lines in the examples are dark just so that they are easier for you to see. You can trace over your drawing with a darker stroke before coloring once you feel that everything is in the right place.
Step 1 – Draw the Head & Shoulders of the Panda Girl
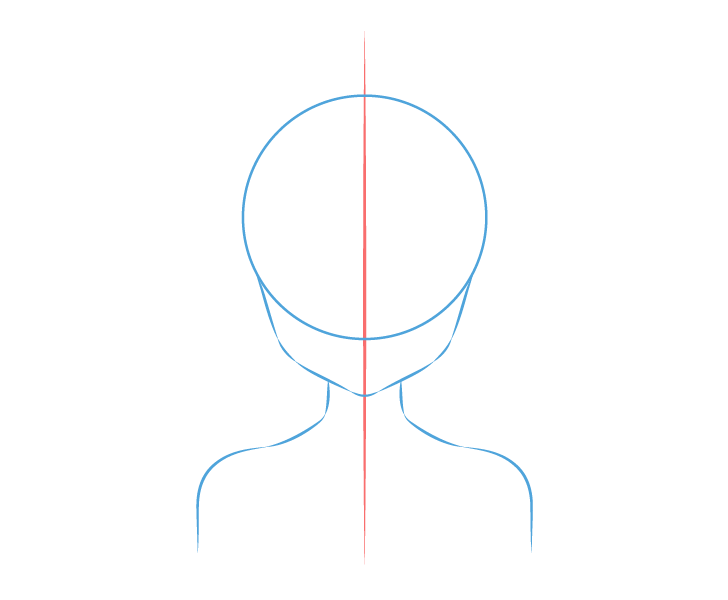
Begin by drawing the head as well as the neck and shoulders of the character. Overall the character will have a fairly large head with a narrow neck and small shoulders.
Start with a straight vertical line through the middle of your drawing area. Near the top of this line draw a circle to represent the top of head and be sure to leave some room above that so that you can later fit in the hoodie and the panda ears on top of it.
Going down from the circle draw the bottom part of the head. You can see the breakdown of the shape based on the little line segments in the example.
The shape of the lower part of the face is as follows:
- Two downwards lines slightly angled inwards (towards middle of face)
- A pair of light curves
- Two more downwards lines that face more inwards than previous pair
- Small curve for the chin
Going down from the lower part of the head draw the neck. Make it slightly wider as it goes down. After that draw the shoulder muscles running downwards towards the shoulders. You can draw the actual shoulders with a pair of curve that then transition into the downward lines for the arms.
Step 2 – Draw the Eyes
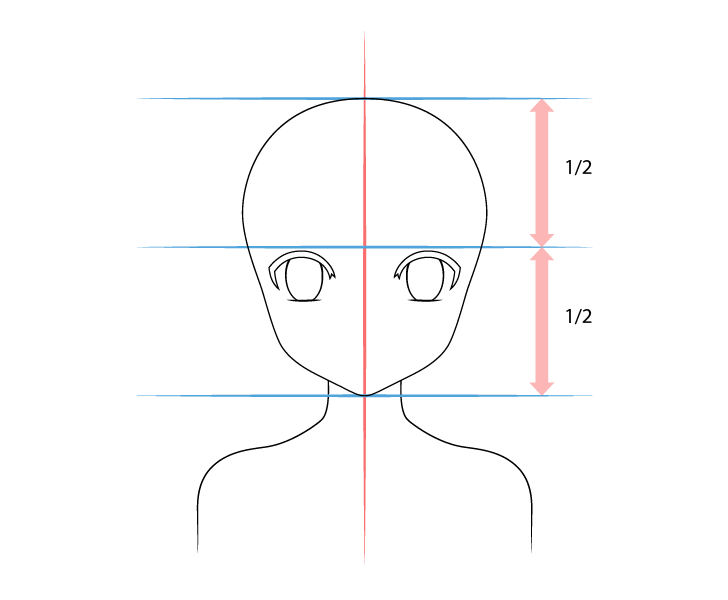
To place the eyes dividing the head in half horizontally and draw them just a tiny bit below the halfway point.
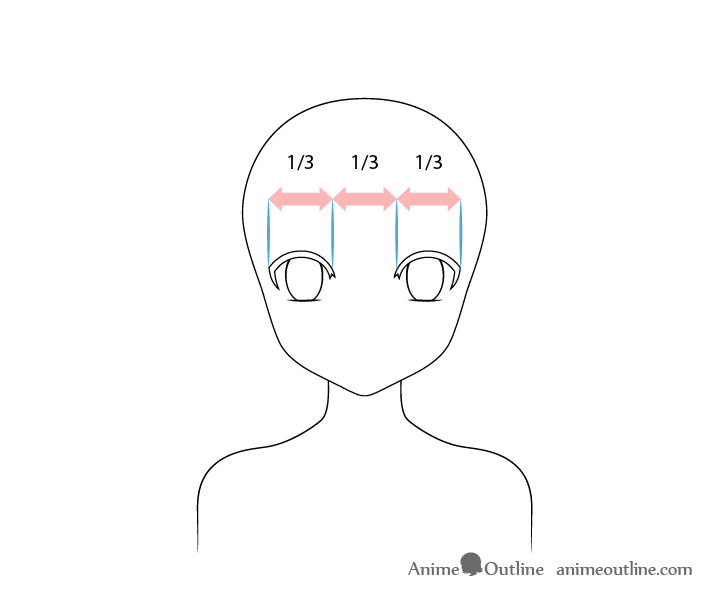
Make them fairly large and tall spaced roughly far enough apart so that you can fit a third eye in between.
For this stage of the drawing leave out any of the smaller details as the goal is to first establish the placement of the facial features.
You can see a more detailed breakdown of drawing the eyes later on.
Step 3 – Draw the Eyebrows
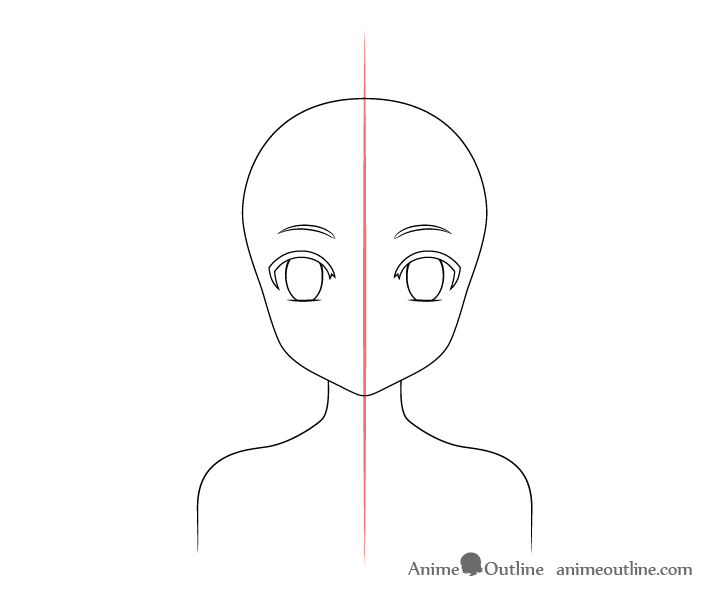
A little bit above the eyes draw the eyebrows. In this case they will be shorter than the eyes.
For different kinds of eyebrows see:
How to Draw Anime & Manga Eyebrows
Step 4 – Draw the Nose
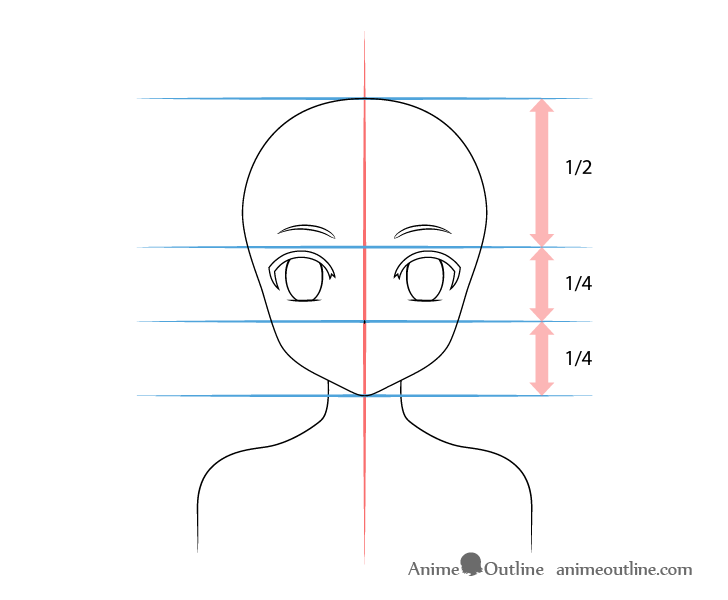
Position the nose between the vertical halfway point of the head and the bottom of the chin. You can draw the nose itself as pretty much a dot or a tiny dash.
Step 5 – Draw the Mouth
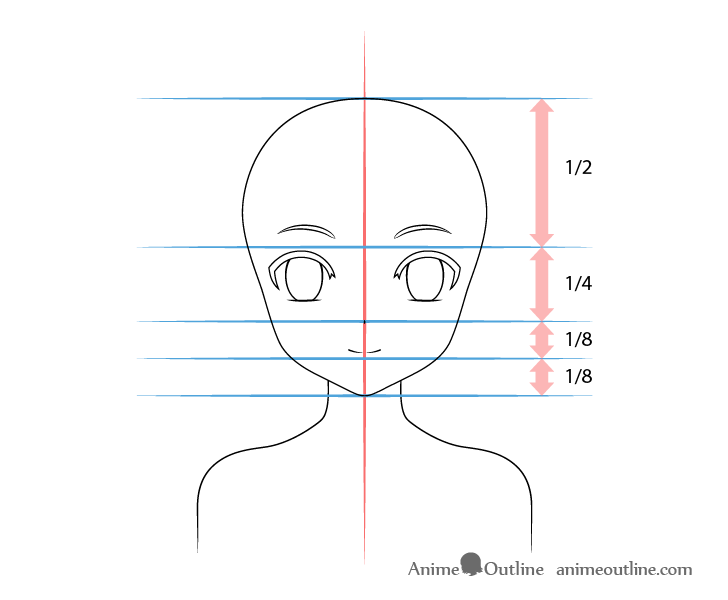
Position the mouth so that it’s upper lip (not actually drawn) is halfway between the nose and the bottom of the chin. You can draw the actual moth just a bit above that.
In this case the mouth will have a light smile. To show this draw it a little more curved than for a normal expression.
For more on mouth expressions see:
How to Draw Anime and Manga Mouth Expressions
Step 6 – Draw the Ears
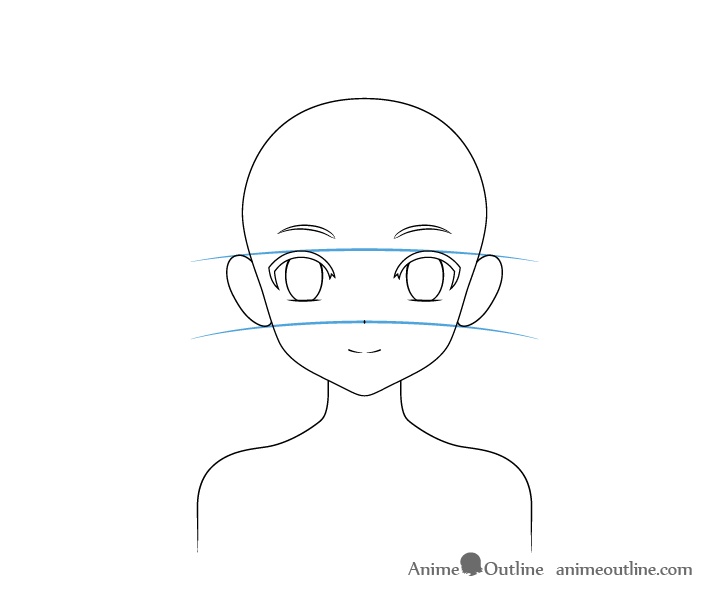
Please note that the ear will actually be hidden by the hair so there is no need to draw them. However, their placement is still shown for reference in case you want to draw a different hairstyle.
Position the eras with their upper parts just a bit below the top of the eyes and their lower parts just a little bit below the dot of the nose.
For alternative ear placement see:
How to Draw Anime and Manga Ears
Step 7 – Draw the Hoodie
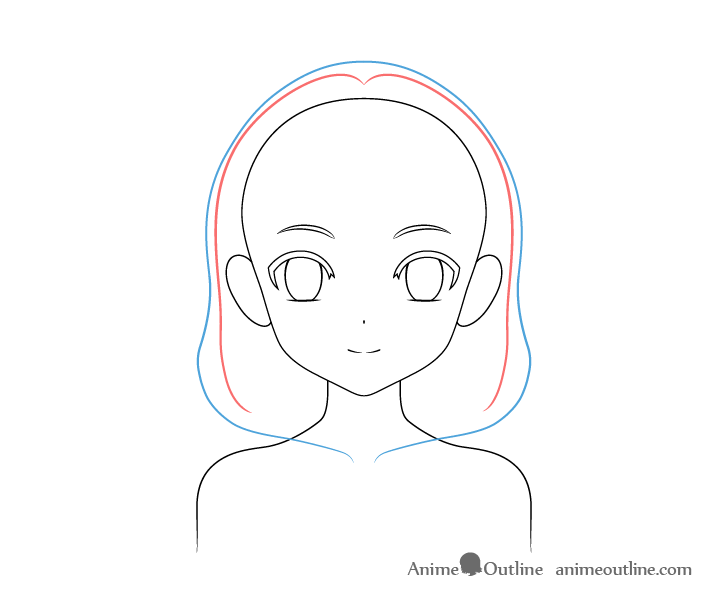
As already mentioned in this case the “panda girl” will actually just be a girl wearing a panda hoodie.
Before drawing the hoodie on the head it’s good to estimate the hair volume underneath it. In the example above the volume of the hair is shown in red and the outline of the hoodie over top of it is shown in blue. You do not necessarily have to outline the hair as was done in the example but at least keep in mind that there will be some distance between the outline of the head and the fabric.
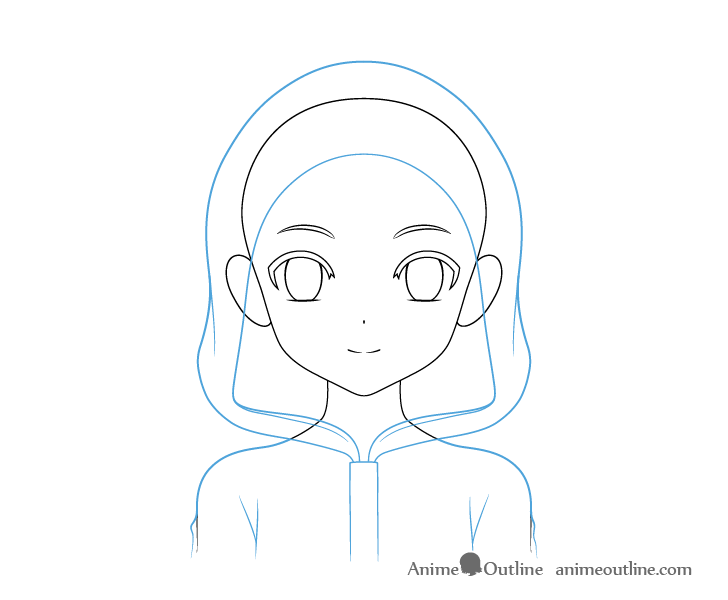
Draw the outer shape of the hoodie first. Afterwards draw the inner opening followed by the folds. Add some folds to the outer sides of the arms as well as some wrinkles around the armpit areas. Also add a placket (the part where the buttons are attached) running down the middle of the hoodie starting from just below the shoulders.
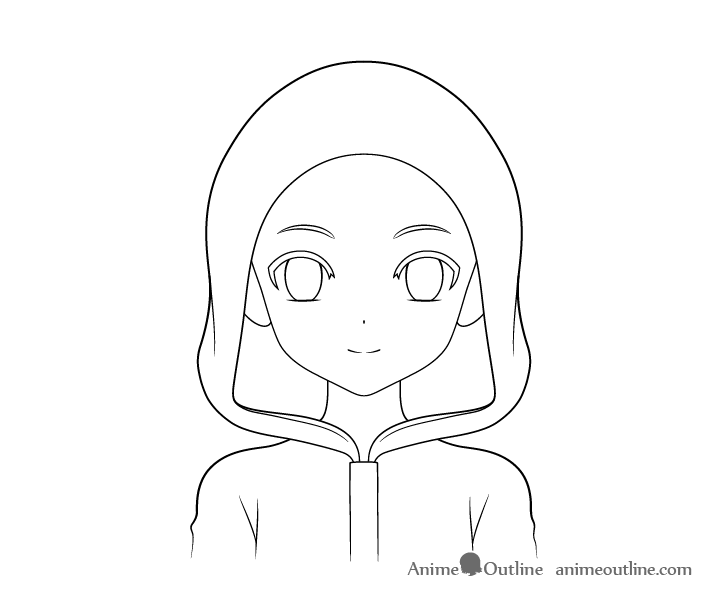
You can erase the parts of the head/arms covered by the hoodie after you are done drawing.
For drawing a slightly different hoodie and other types of head ware see:
How to Draw Anime Hats & Head Ware
Step 8 – Draw the Hoodie Panda Ears
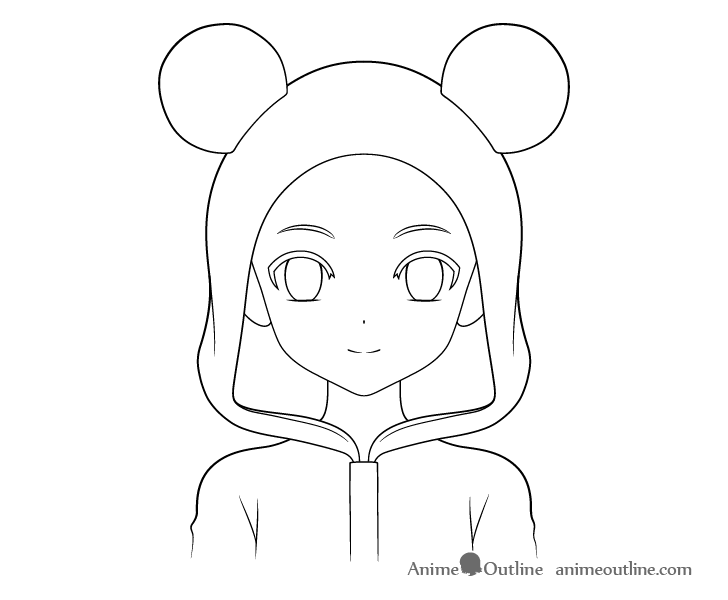
At the top of the hoodie add the panda ears. Make these fairly round in shape. To show that they are made of soft fabric you can deliberately make their outlines slightly uneven.
Step 9 – Draw the Side Section of the Hair
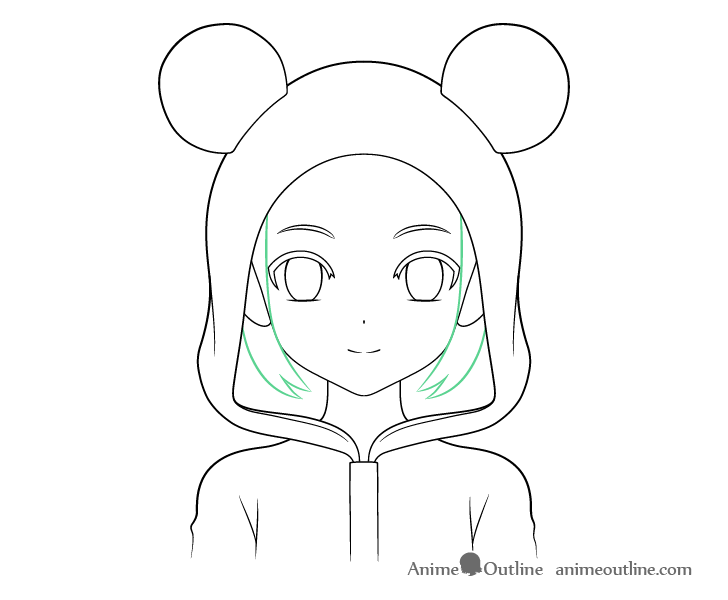
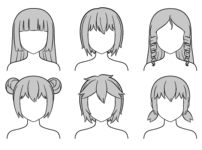
Coming out from below the hoodie draw the side sections of the hair. Make them slightly curved so that they “hug” the face.
For more on this drawing approach see:
How to Draw Anime and Manga Hair – Female
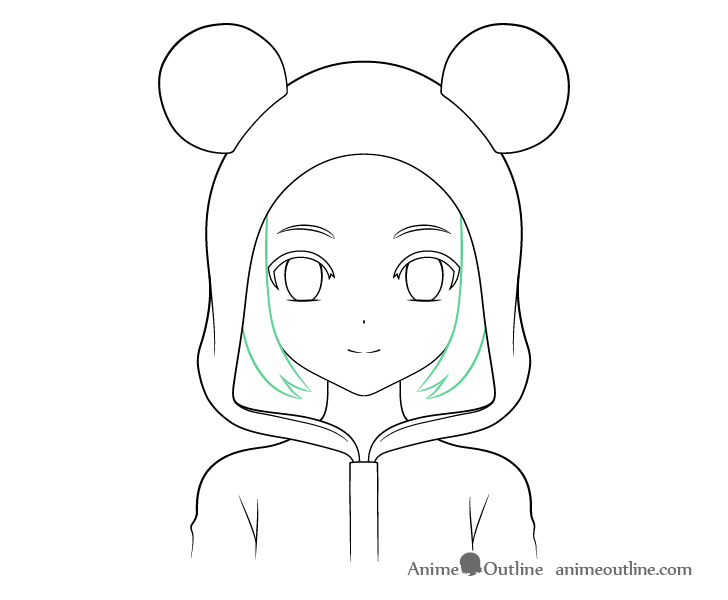
You can erase the parts of the head and ears (if you chose to draw them) covered by the hair so that you again have a clean drawing as in the above example.
Step 10 – Draw the Front Section of the Hair
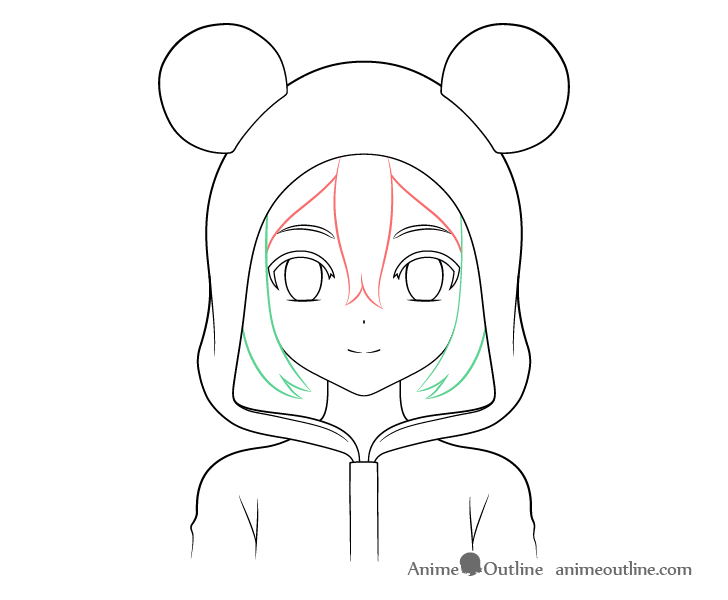
Draw the middle section of the hair (shown in red) with a big clump running down in the center and the rest of it swept under the sides.
Step 11 – Draw the Back Section of the Hair

Finally draw the hair in the background (shown in blue).
Step 12 – Draw the Draw the Eye Details
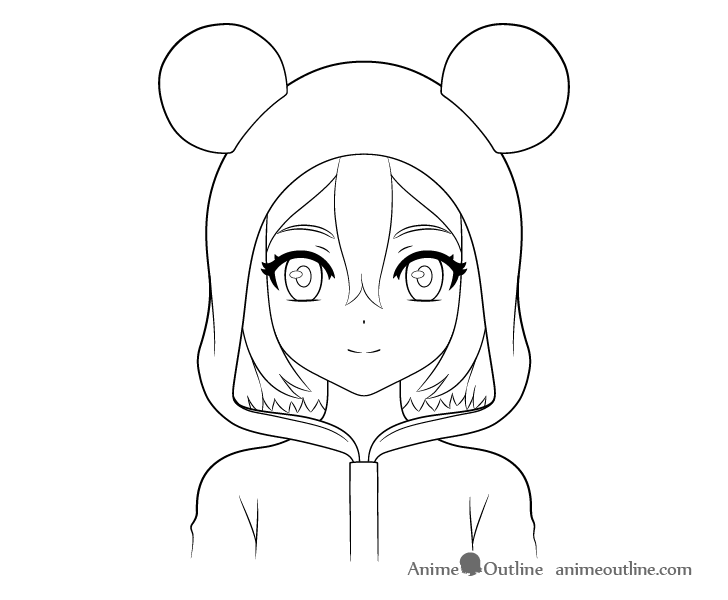
Add the following details to the eyes:
- Hints of the eyelids
- Hints of individual eyelashes
- Pupils
- Highlights/Reflections in eyes
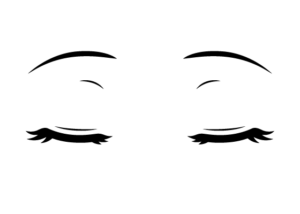
You can show the eyelids as just a pair of tiny curves positioned closer to the inner sides of the eyes and slightly above the eyelashes. You will also want them to be angled slightly towards the nose.
Shade the outlines of the eyelashes black and draw some spiky looking lashes into them as you shade.
Draw the pupils shaped the same as the irises with each one overlapped by a highlight.
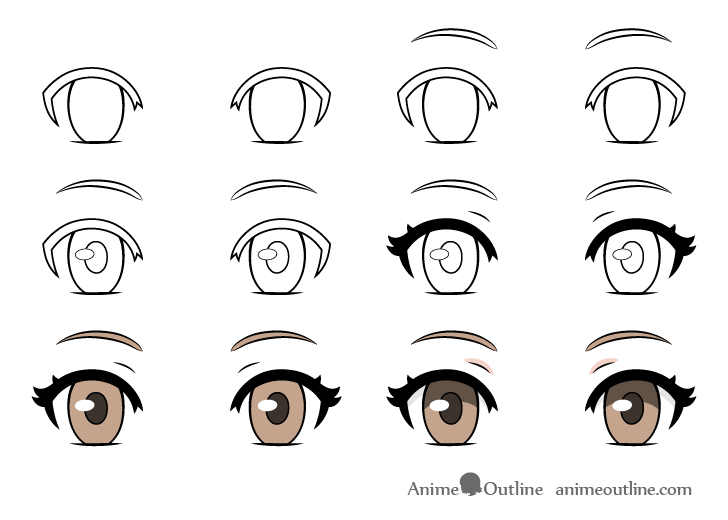
You can see a breakdown of all of the drawing step for the eyes above. However, you should hold off on coloring until you get to that stage of the tutorial.
Step 13 – Draw the Hoodie Details
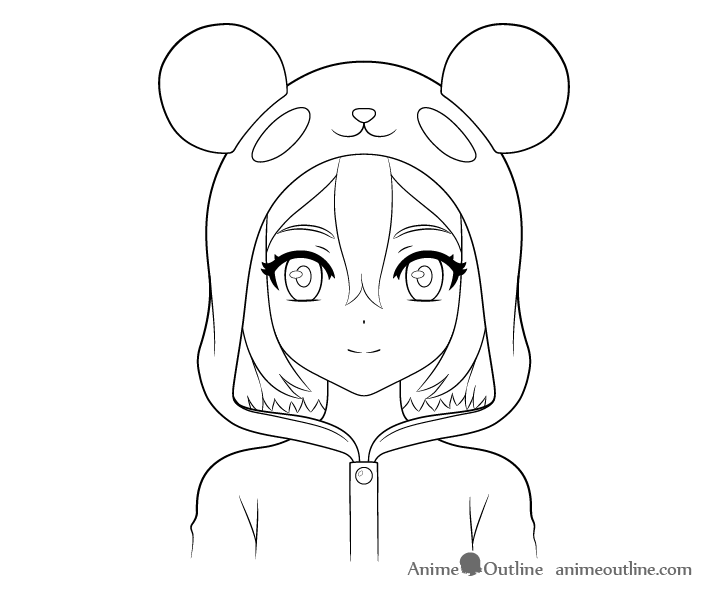
At the top of the hoodie draw the panda face as shown in the example. It can be fairly simple with just the outlines of the black areas that panda have around the eyes (no need to draw the actual eyes) the mouth and the nose.
You can also add a button onto the placket and outline a tiny highlight area inside it.
Once done with this stage of the drawing you can trace over your lines to darken them. However don’t darken the outlines of the highlights on the eyes/button. You want to keep these lines light so that they blend into the color.
Step 14 – Apply Color
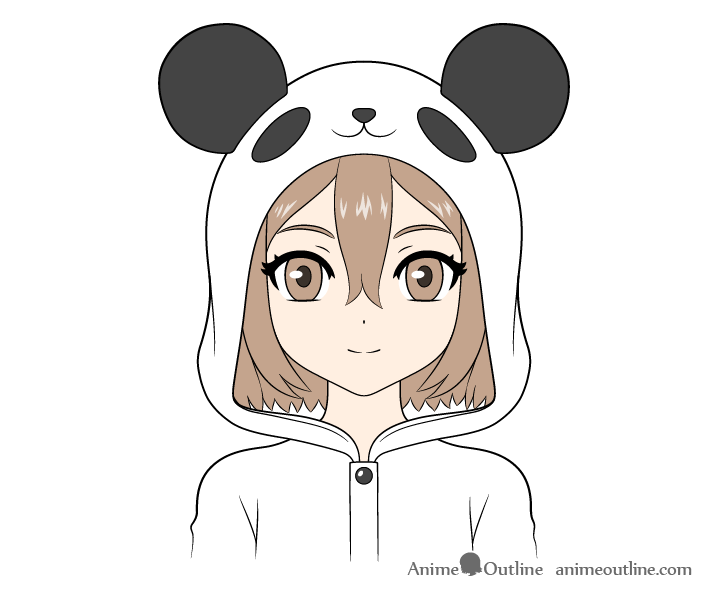
You will only need a few colors for the panda girl.
Make the panda ears, eye areas, nose dark grey/black. You can also do the same for the pupils (keep the highlights white) and the button. Make the irises and hair brown. You can make the face/neck a very light orange/pink. Leave the rest white.
Step 15 – Add Shading & Finish the Panda Girl Drawing
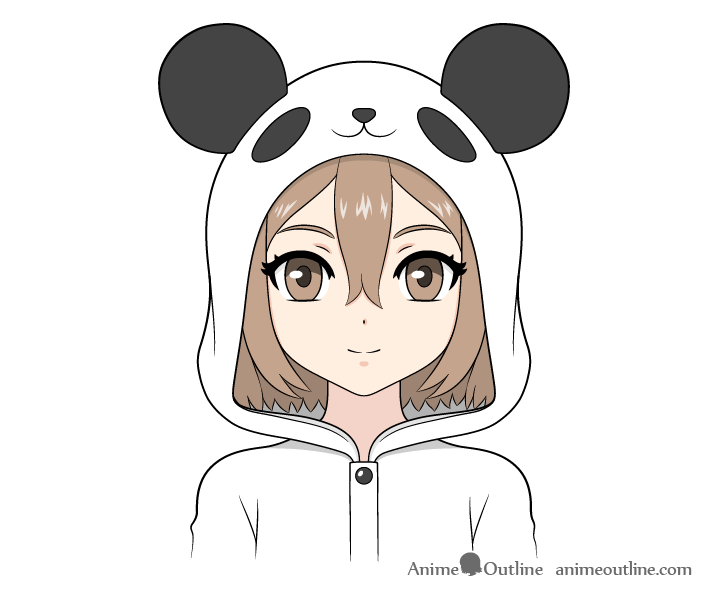
You may notice that in the previous examples the drawing looks a bit flat and the eyes seem to have a bit of a “stare” to them. To fix this you can give the drawing a bit of shading.
Generally shadows form based on how the subject is illuminated. In this case the character will have fairly generic shading as though she is in a well lit room or outdoors during the day with the main light source somewhere above her.
To get rid of the “staring look” start by shading the upper part of the irises. Afterwards place some lighter shadows as follows:
- On the very top of the visible hair (from the hoodie)
- Around the eyelids (as these areas in indented less light reaches there)
- Top of the white of the eyes (from the eyelashes)
- Around the middle clump and side clumps of the hair (cast by those hair sections)
- To one side of the nose (cast by the nose)
- Below the mouth (cast by the bottom lip that is not actually drawn)
- The back section of the hair (that area is darker as less light reaches to the back of the hood)
- The back of hood (again less light reaches here)
- On the entire neck (cast by the hoodie and the head)
- Below the hood (cast by itself)
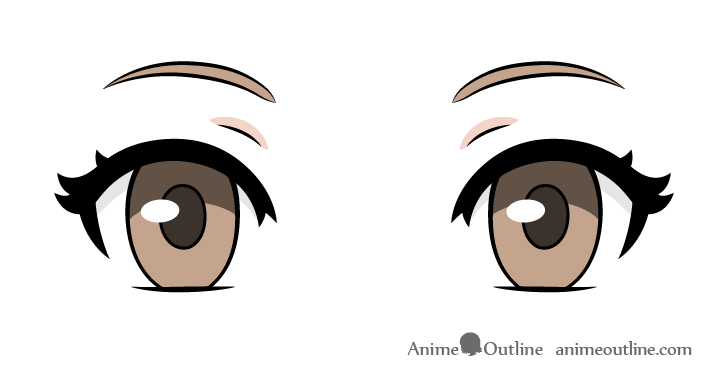
You can see all of the details of the eyes in the large/close up drawing above.
Keep in mind that overall this is a fairly stylized character and the goal is NOT to create the absolute most accurate shading but instead to just have it accurate enough to looks believable.
Conclusion
In this tutorial the “panda girl” is given the panda features through her hoodie. Such hoodies (especially bear themed ones) are fairly common in anime and manga.
If you wish you can also use very similar steps to draw a hoodie with the theme of a different animal or a different type of bear. Simply change the shape of the ears and the face (particularly the eye ares).
If you’ve found this tutorial helpful and would like to later try drawing some other animal or fantasy themed anime girl also see the following:
- How to Draw an Anime Fox Girl Step by Step
- How to Draw Anime Cat Girl (With Video)
- How to Draw an Anime Vampire Girl Step by Step
- How to Draw Anime Wolf Girl Step by Step
- How to Draw an Anime Elf Girl Step by Step
- How to Draw an Anime Girl in a Mask Step by Step
- How to Draw a Princess in 12 Step (Anime or Manga)

