How to Draw an Anime Cat Step by Step
This step by step tutorial shows how to draw a cat or kitten in the anime style with a detailed twelve step breakdown of the drawing process.
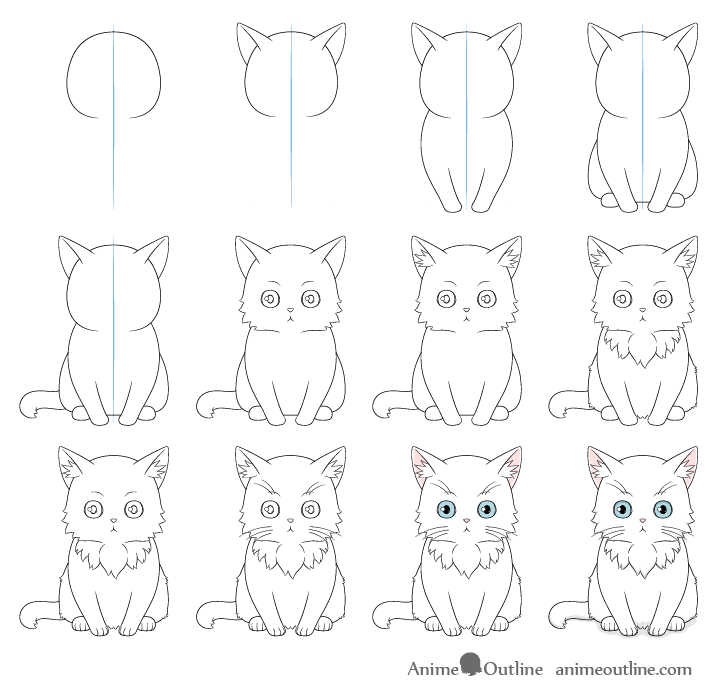
When it comes to anime and manga, cats and other animals tend to have a lot of variety in their designs. Some may be fairly realistic while others are highly stylized. As such it can be somewhat confusing as to how you should go about drawing one. To help this guide shows how you can take the defining characteristics of the animal with the defining characteristics of the anime style to create an anime looking cat or kitten.
If you are going to be following along with the tutorial using pencil and paper it’s recommended that you start with light lines as you will need to erase parts of the drawing in a some of the steps.
For drawing an anime cat girl see:
How to Draw Anime Cat Girl (With Video)
Above is a line by line drawing video for the anime cat/kitten. It’s recommended that you both watch it and read the instructions below.
If you like this tutorial please be sure to leave a like and to subscribe to the AnimeOutline channel. Your likes and subscriptions are VERY helpful and very much appreciated.
Step 1 – Draw the Head of the Cat/Kitten
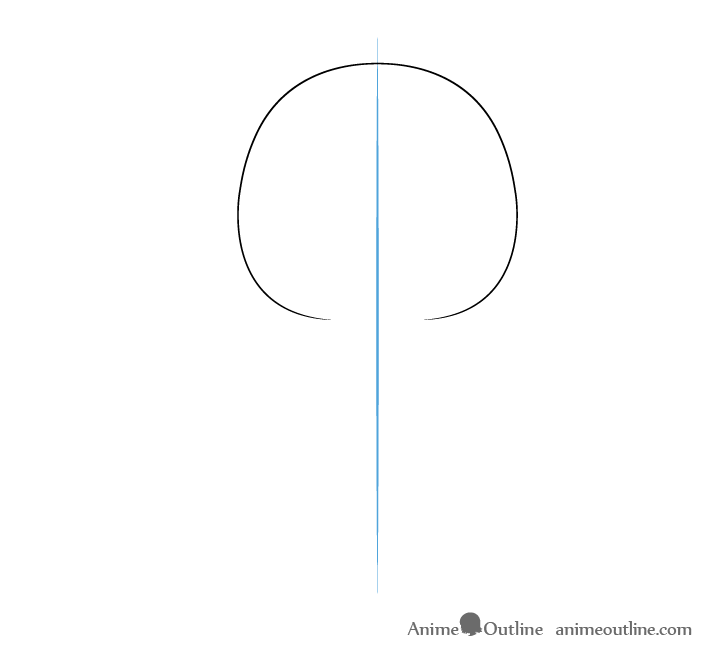
You will want to begin the drawing of the the cat with the head. However, first draw a straight vertical line to act as a guide. This can make it easier to see if both halves of the head (and body) are even in width. You will want the drawing to be fairly symmetrical (but not perfectly so).
Position the line a slightly to one side of your drawing area to leave more room on the side with the tail.
Draw the shape of the head somewhat similar to an upside down apple. Make it a little wider as it goes down and leave a gap in it’s outline at the very bottom.
Step 2 – Draw the Ears
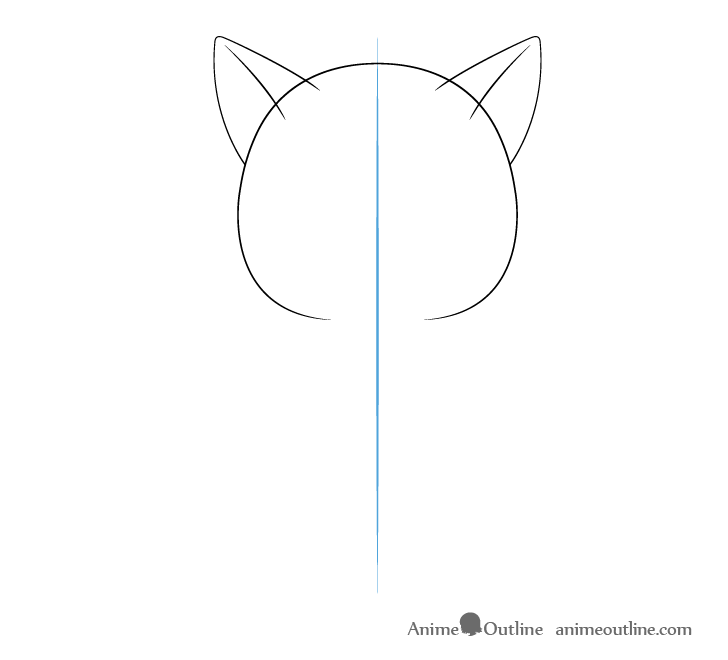
On top of the head add the ears. You will want their forward facing sides to cut into the outline of the head to show it’s curvature.
Make each ear wider at the base and narrower as it goes up.
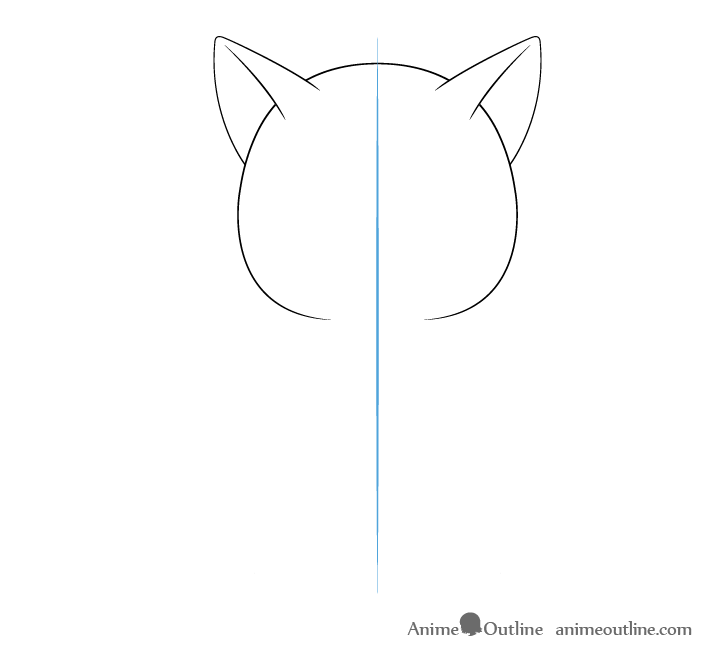
You can earse the parts of the head overlapped by the ears once done.
Step 3 – Draw the Body & Front Legs
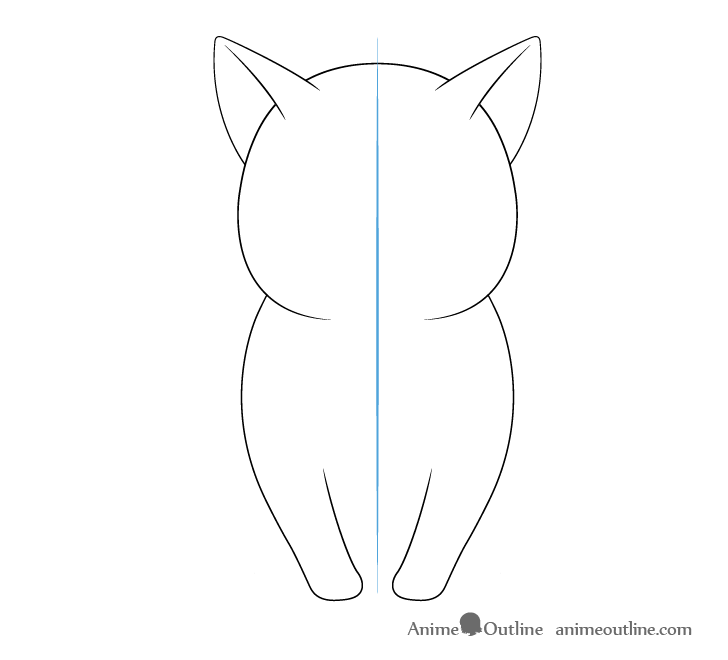
Going down from the head add the body which should transition into the front legs. As this is a stylized anime cat (or kitten) make the body and legs fairly small and short in relation the the head.
Step 4 – Draw the Back Legs
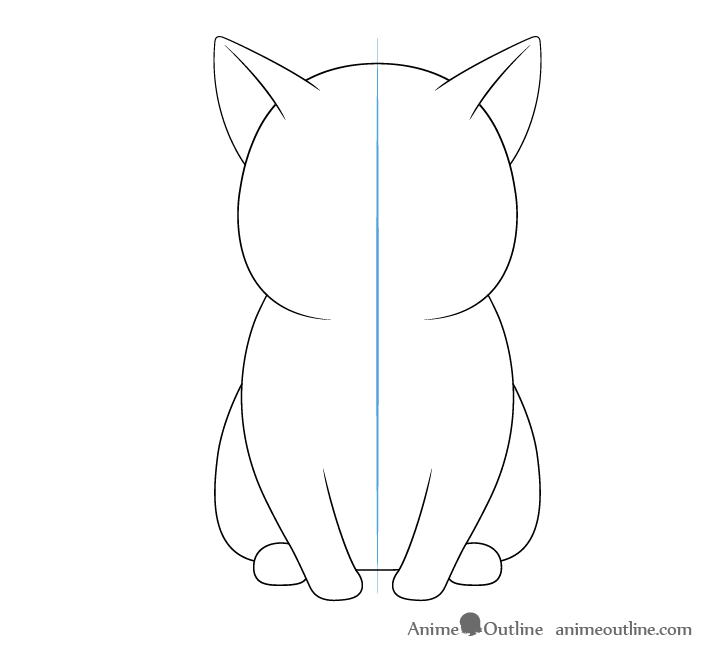
In this case the cat will be sitting down so you can draw the back legs as shown in the example.
First draw the paw and and then add the curve of the leg on each side of the body.
Step 5 – Draw the Tail
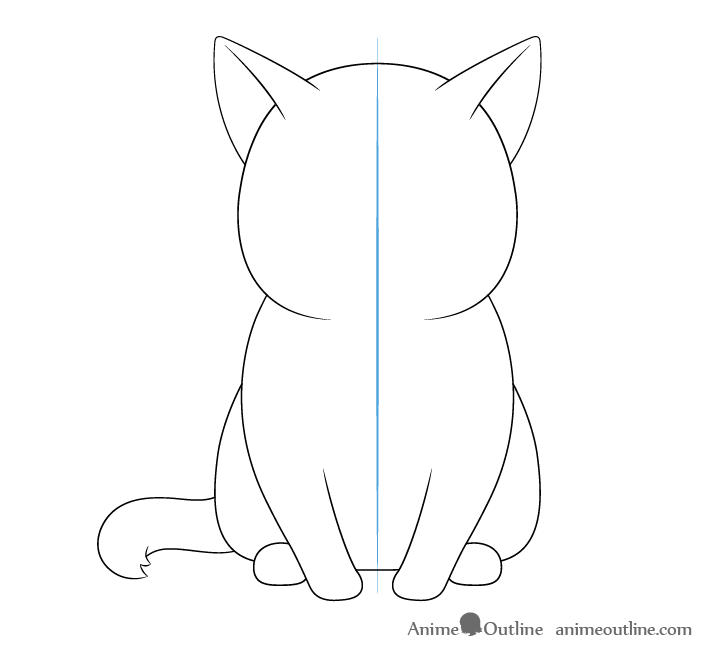
For the last major part of the body’s outline add the tail. Draw it with a wave in it’s overall shape and the tip curving forward. Also give it a split on it’s very end to createa a hint of fur.
Step 6 – Draw the Face
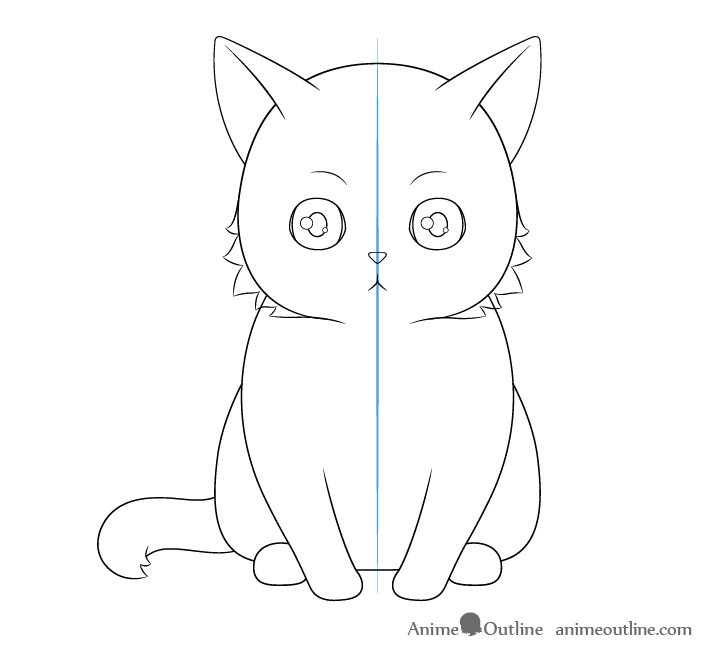
As is typical of the anime and manga styles, the cat will have big eyes with a small nose and mouth.
- Draw the eyes with very large irises (almost the side of the entire eye).
- Add a pair of reflections inside the eye (a large one for the main light source and a small one for the secondary one).
- Draw the pupils as a pair of vertical ovals.
- Make the nose close in shape to a triangle (with rounded corners).
- Draw the mouth as an upside down “Y” shape.
- Add a hint of eyebrows as a small curve above each eye.
Before adding the eyes you can optionally draw a straight horizontal line to help you see if they are on the same level and erase it afterwards.
Once you have the facial features placed you can add some fur along the lower part of the cat’s head (to create what looks like it’s cheeks). Similar to anime hair draw the fur in clumps using the outline of the head from step one as a guide for placing them.
For drawing actual anime hair see:
How to Draw Anime and Manga Hair – Female
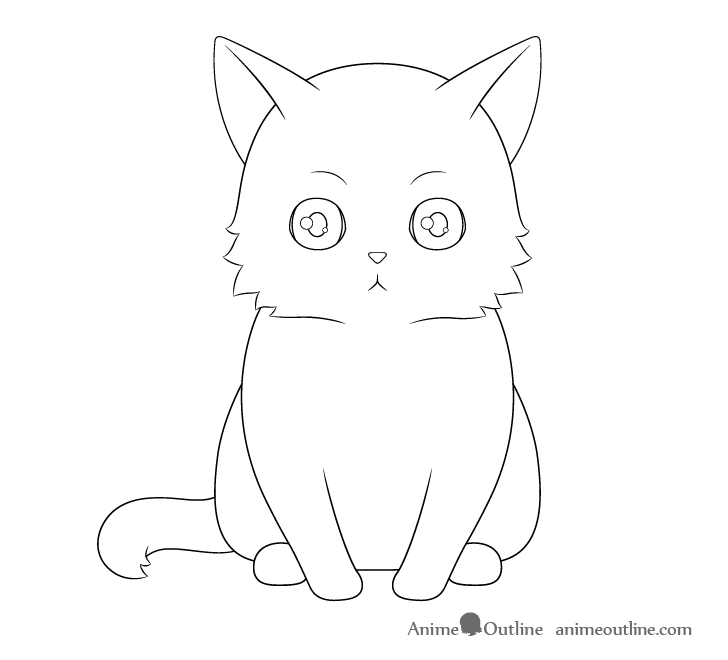
Once you have the cheek fur once again clean up your drawing (so that it looks similar to the above).
Step 7 – Draw the Ear Fur
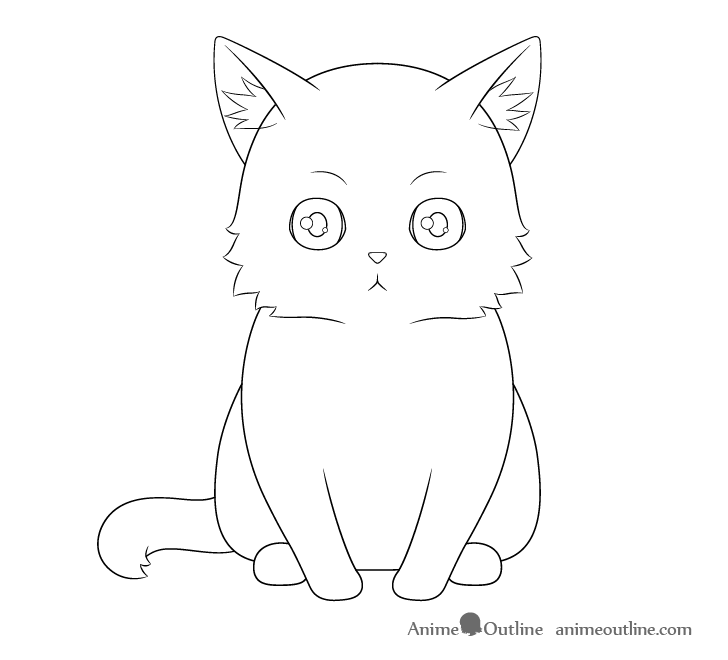
Add some fur sticking out of the ear openings (cat’s tend to have this). Draw it as a series of fairly long and narrow clumps.
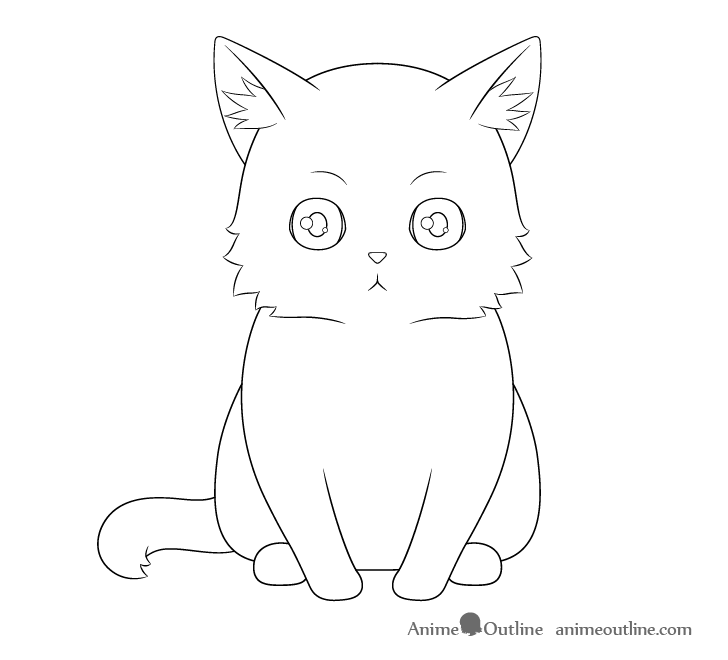
Erase the parts of the head covered by these clumps once you have them in place.
Step 8 – Draw the Fur Along the Body
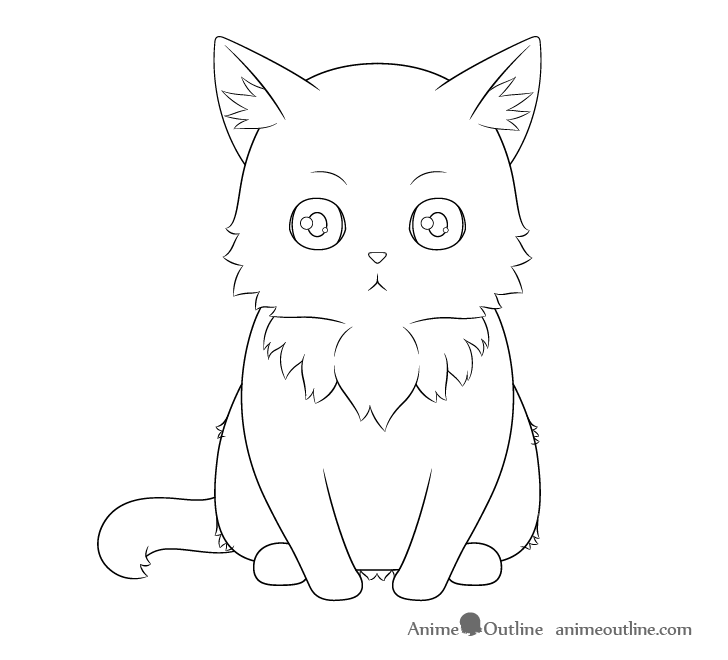
Add a large batch of fur clumps below the cat’s head to give it a small mane (particularly fluffy cats tend to have this).
Afterwards add a few tiny clumps along the sides of the body to again help the cat look more fluffy.
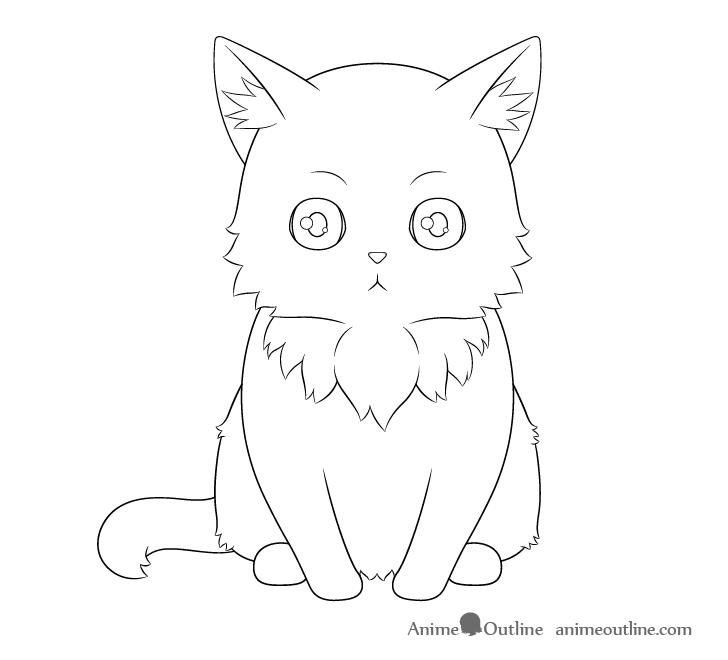
Yet again clean up your drawing by erasing parts of the body’s outline in the spots where you’ve added the small fur clumps.
Step 9 – Draw the Paws
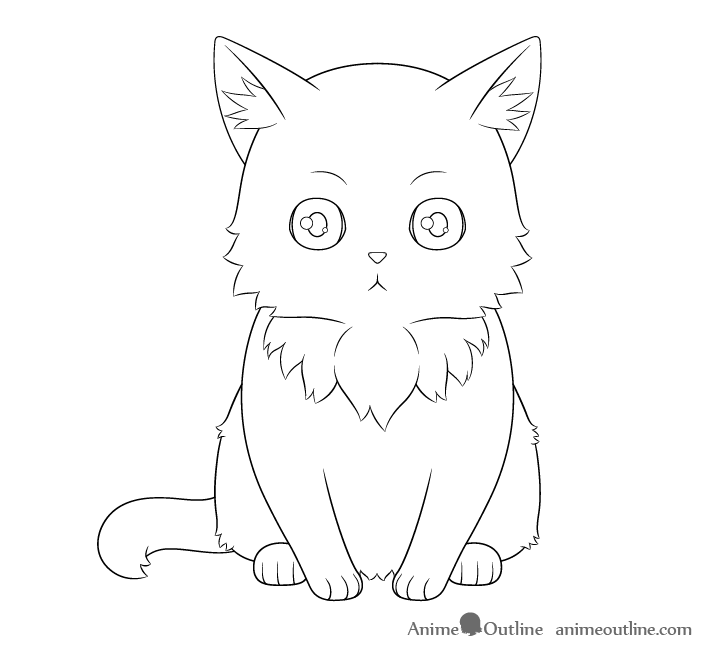
Draw some lines along the paws to create the cat’s toes. As it’s front feet are viewed on more of an angle draw the toes with more of a curve in their shapes. The back paws are facing more towards the viewer so their toes can be defined with lines that are just barely curved.
Step 10 – Draw the Whiskers
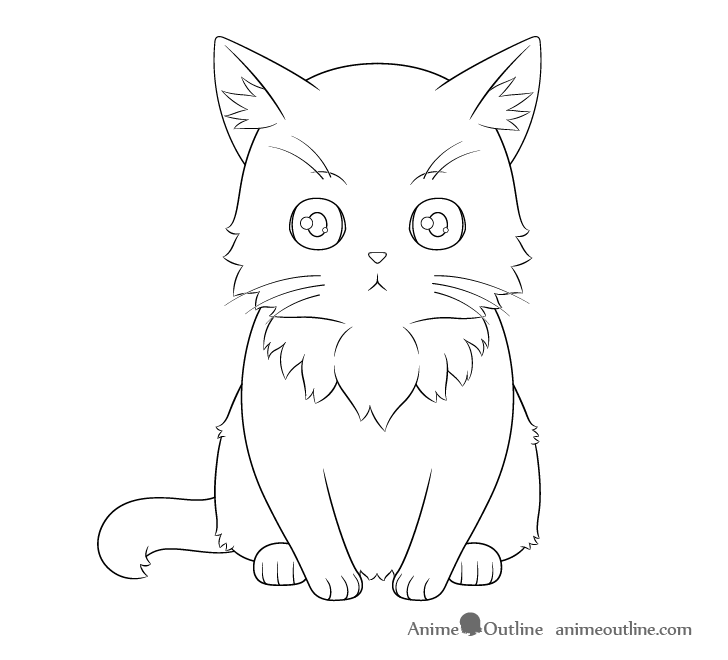
For the last set of details add the whiskers coming out from the lower part of each side of the face. You can also add a pair of long hairs coming out of each of the eyebrows (cat’s tend to have these).
Step 11 – Apply Color
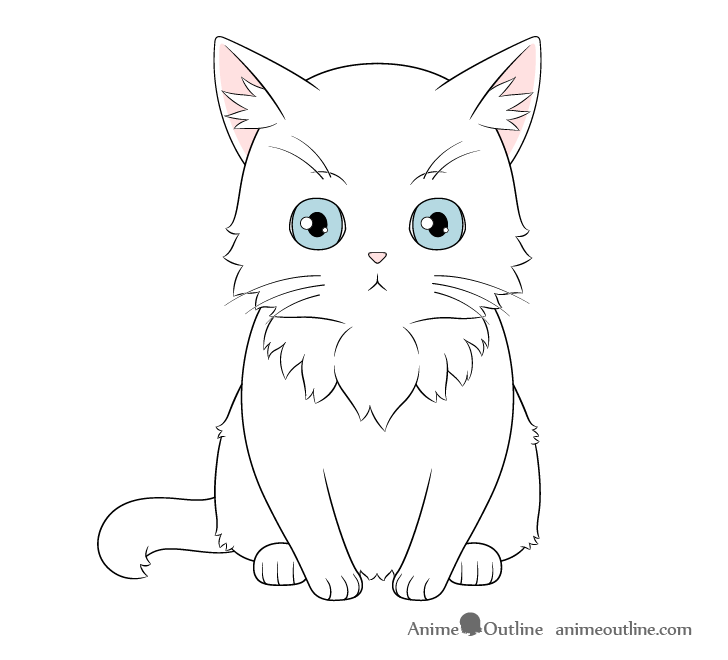
In this case the cat will have white fur, blue eyes, a pink nose as well as some pink on the inner parts of it’s ears.
Make it’s pupils black (leaving the highlights white).
Step 12 – Add Shading
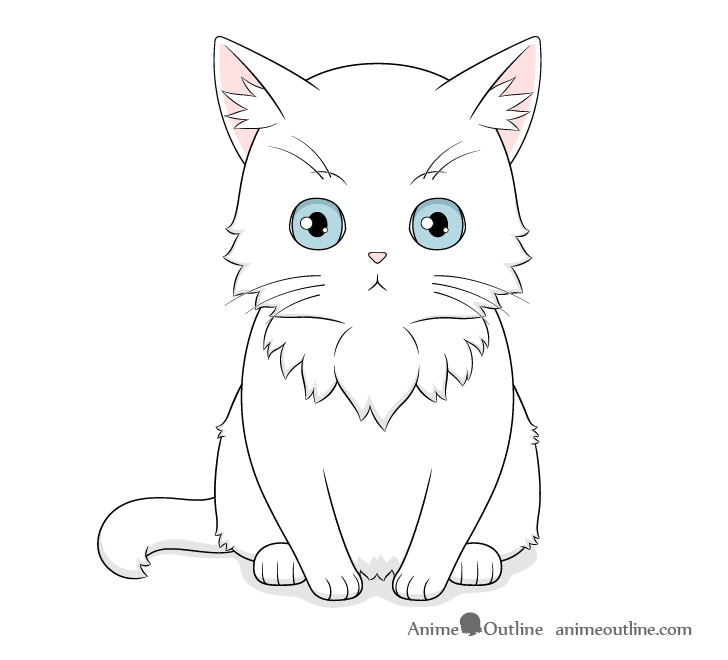
Generally the shadows will depend on the light source but in this example because the cat is fairly stylized the shading will be done in a very generic and simplified way.
You can begin darken the upper parts of each of the eyes.
The shadows along the body will be added as though the cat is either outdoors during the day or in a well lit indoors environment. In such as setup you can add them as follows:
- Along the clumps on the lower part of the head
- On the bottom of the clumps that make up the mane
- Along the bottom of the tail
- Along the bottom of the body
- On the bottoms of each of the paws
You can also add a shadow underneath the cat. This will help make it look like it’s actually sitting on top of something instead of just floating in space.
Overall keep in mind that the goal for this particular drawing is not to create the most accurate or realistic shading but to add it in a way where it just looks believable.
Conclusion
There are a lot of variations in the anime style especially when it comes to drawing animals. Some tend to be drawn closer to real ones while other may be stylized to the point where it’s hard to tell what they are.
This tutorial shows how you can take the characteristics of a real animal and mix them with the anime style to create a drawing that is fairly stylized but at the same time still easily recognizable as a cat (or kitten).
For more tutorials on drawing anime animals as well as cute characters and characters with animal features see:
- How to Draw an Anime Fox Girl Step by Step
- How to Draw Anime Wolf Girl Step by Step
- How to Draw Anime Dog Girl Step by Step
- How to Draw a Cute Anime Dog in 7 Steps
- How to Draw a Cute Girl’s Face in 12 Steps

