How to Draw Anime Girl Full Body Step by Step
This tutorial shows how to draw the full female anime body. It provide suggestions for what proportions you should use along with detailed step by step drawing examples.
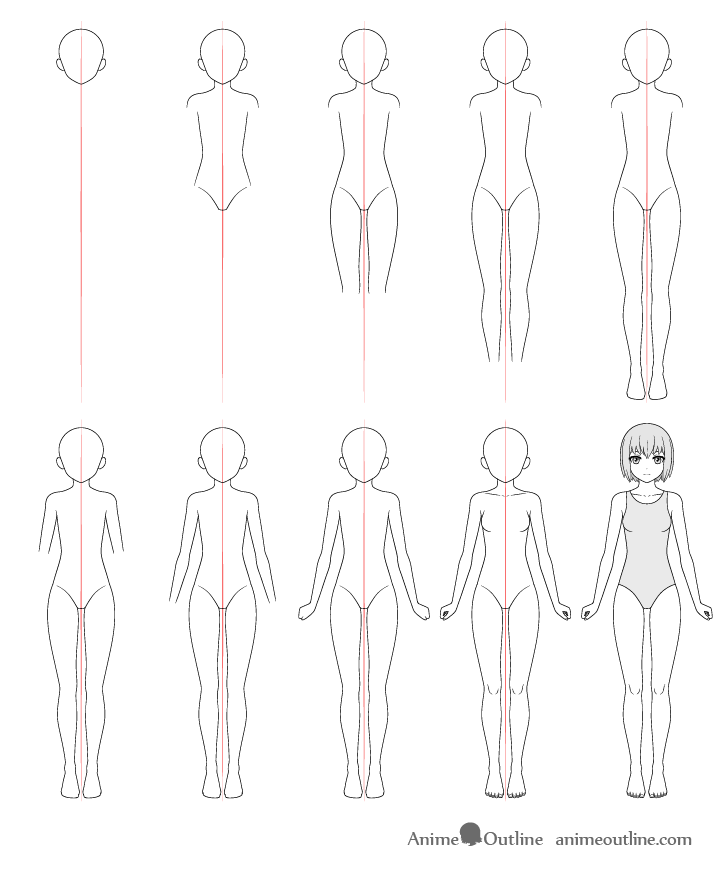
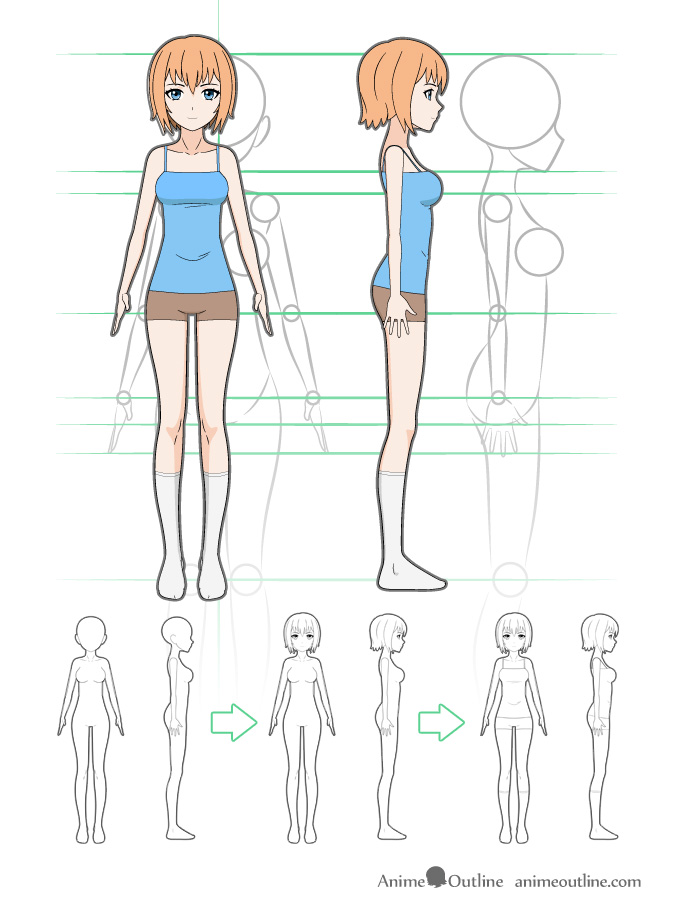
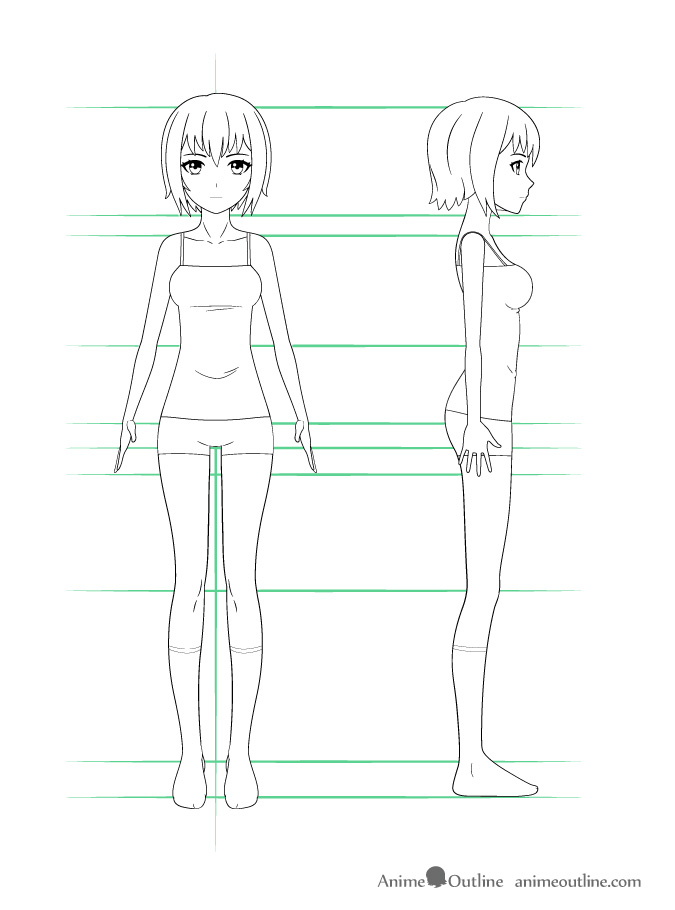
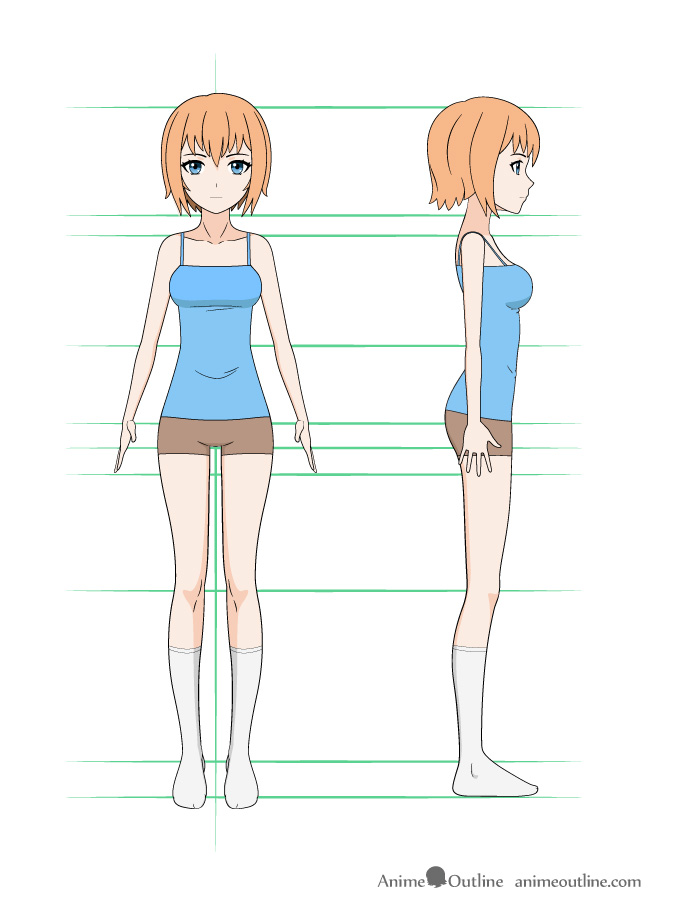
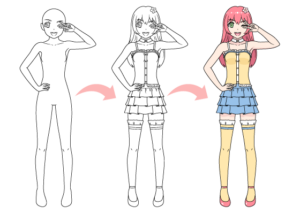
You can see the main stages of the drawing in the preview example above. There are also many more illustrations throughout the tutorial that provide the proportions and close up examples of the smaller parts of the body (to make them easier to see).
Please note that this particular guide is for an average looking high school or adult anime/manga female. The proportions for kids are generally different.
For drawing a little girl see the following tutorial:
How to Draw an Anime Little Girl (Entire Body)
If you are going to be following along it’s recommended that you make the drawing as large as you can to make it easier to add the small details. Unless drawing digitally start in pencil and make very light lines that you can easily erase as you will need to do so in some of the steps.
Step 1 – Draw the Head
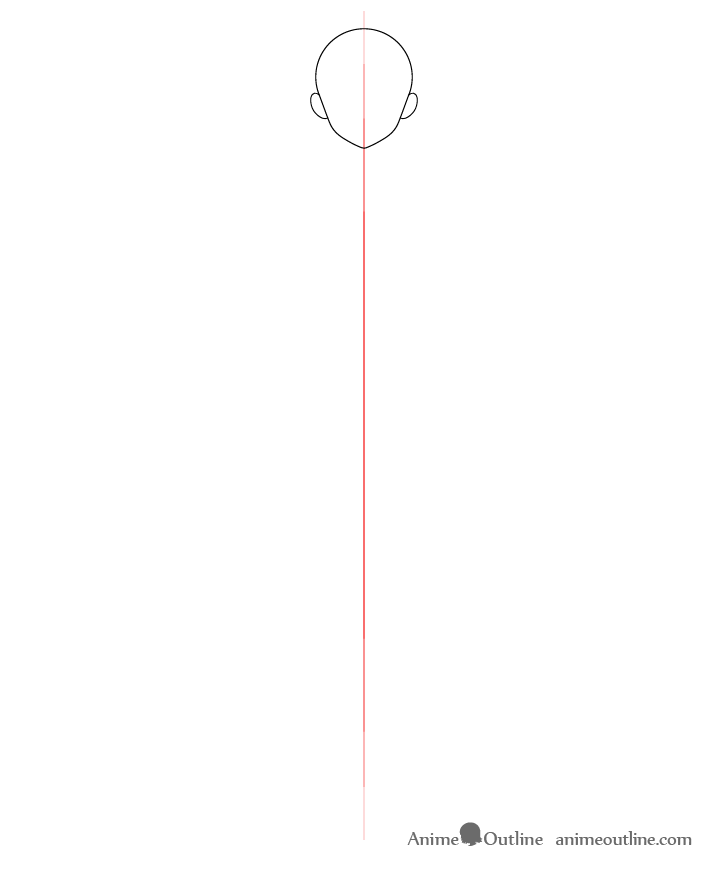
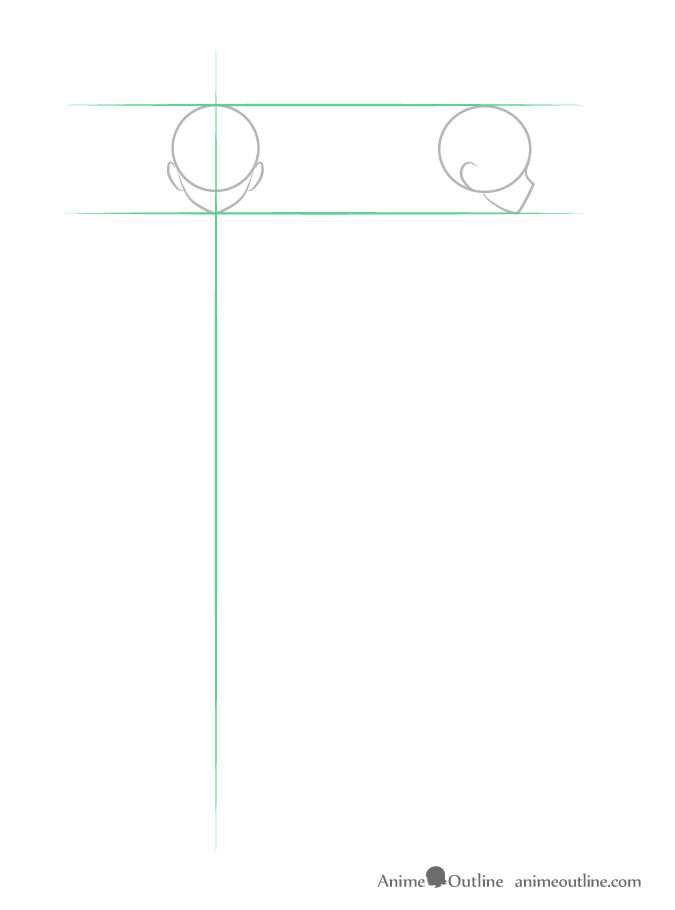
First draw a straight vertical line through the middle of your drawing area. This will act as a guide to help insure that the body is not skewed to one side. As the drawing is symmetrical the line can also help you see if both halves of it are even in width.
Towards the upper end of this line draw the head. Place it in a way where you have bit of room at the top (if you wish to add the hair) and plenty of room at the bottom for the rest of the body.
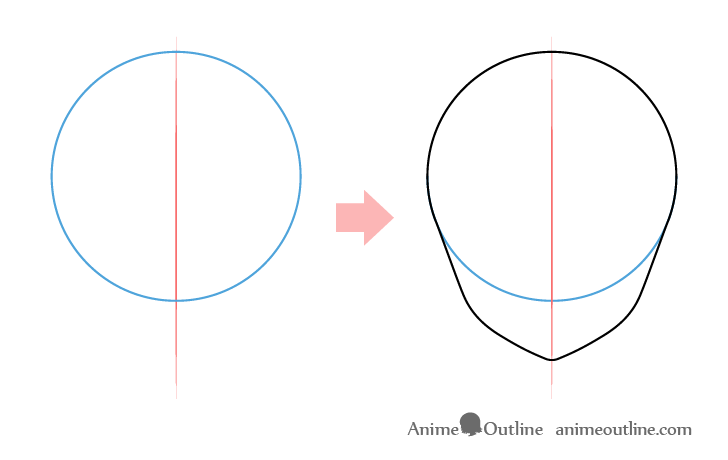
To make it easier to structure the head you can first draw a circle for it’s upper part and then add the lower part onto that as shown in the example above. You can erase the lower part of the circle once done.
As this is an anime character be sure to make the lower half of the head quite small and give it a fairly pointy chin.
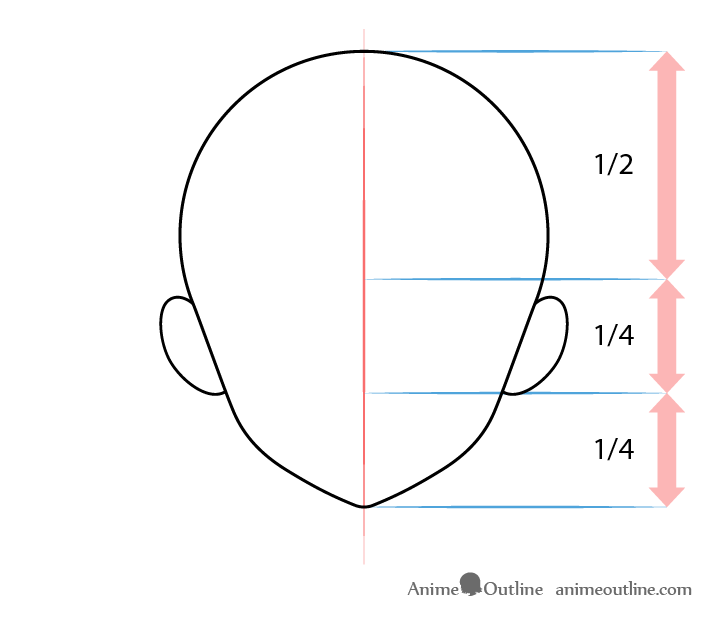
To add the ears position them roughly a quarter way up from the bottom of the chin.
Please note that you can also draw the ears later if you plan to add the rest of the facial features.
Step 2 – Draw the Body
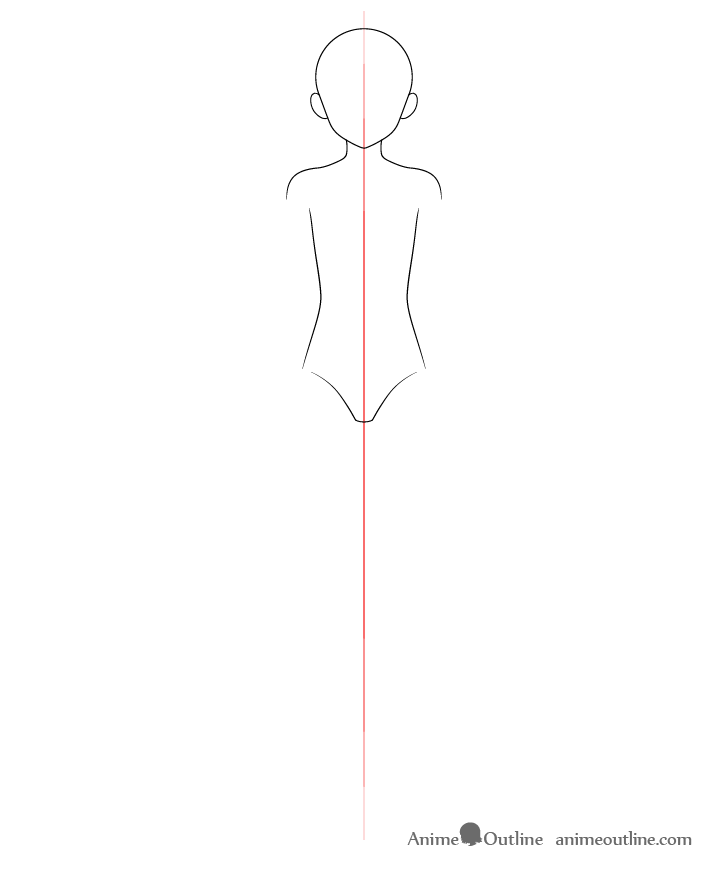
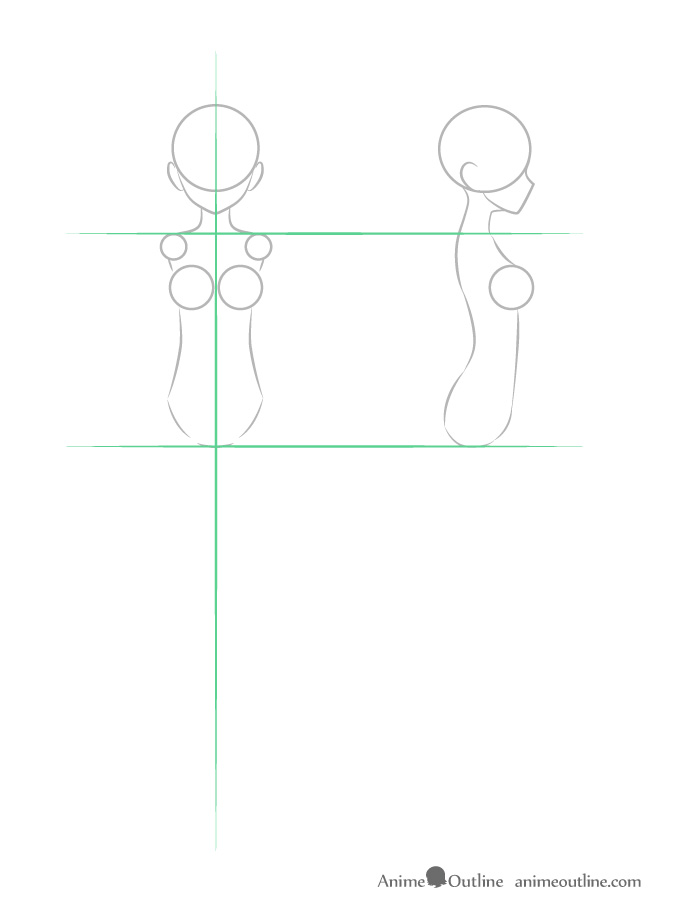
Going down from the head add the neck and body. However, before you start with this part of the drawing you should read the explanation below.
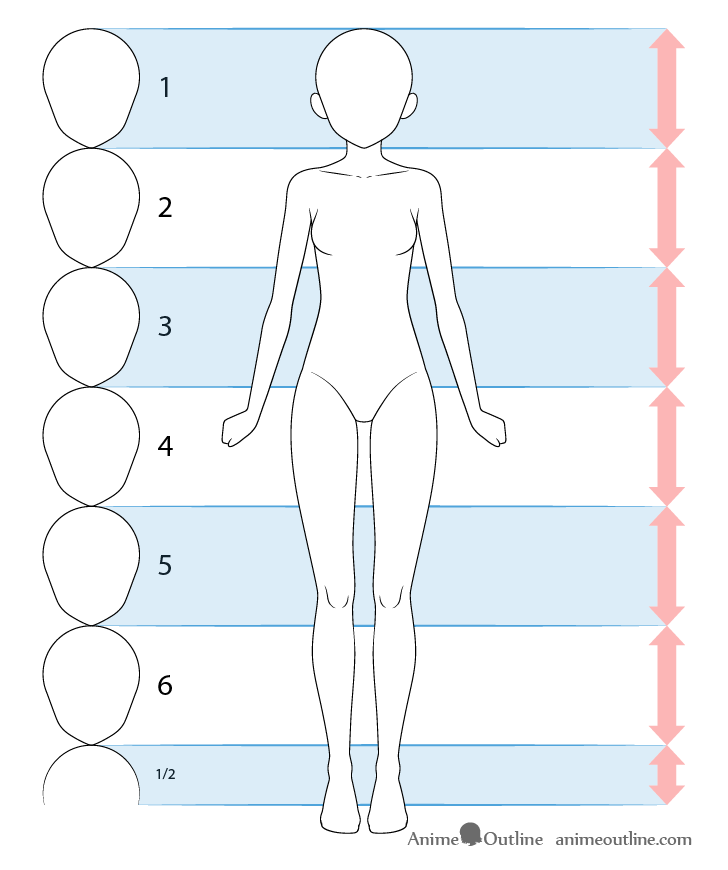
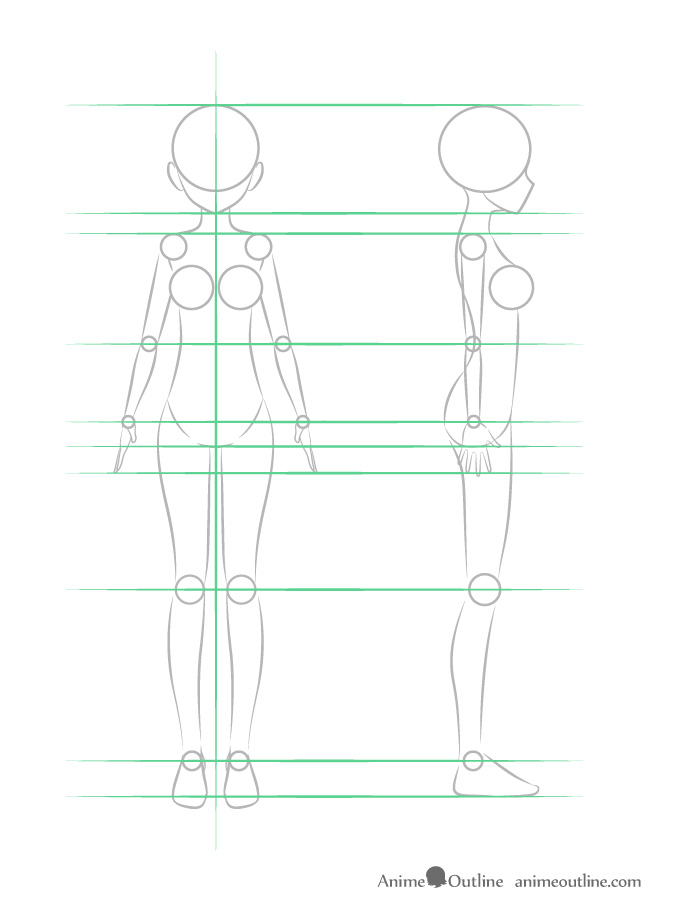
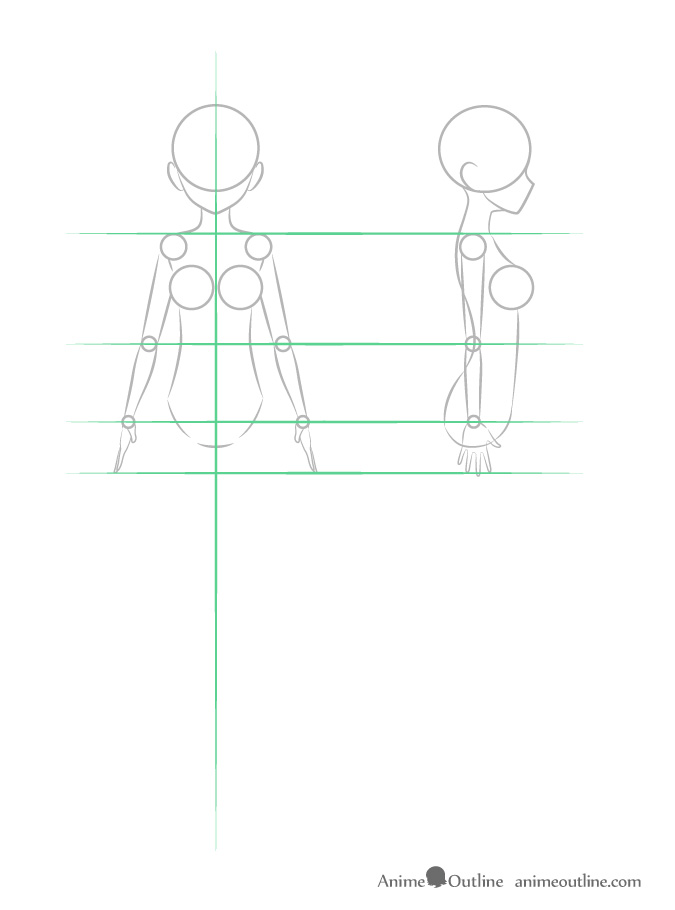
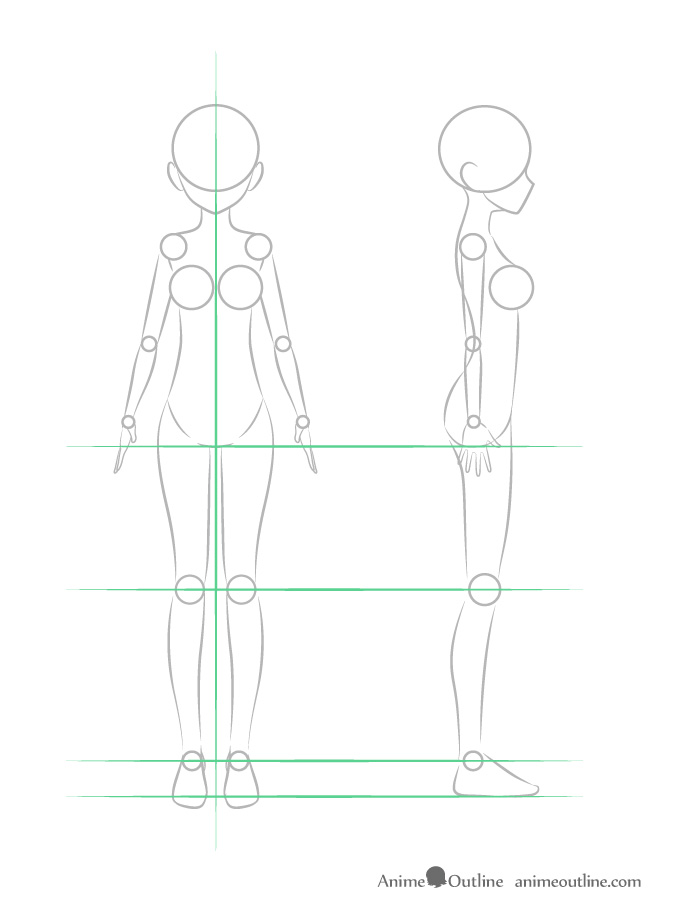
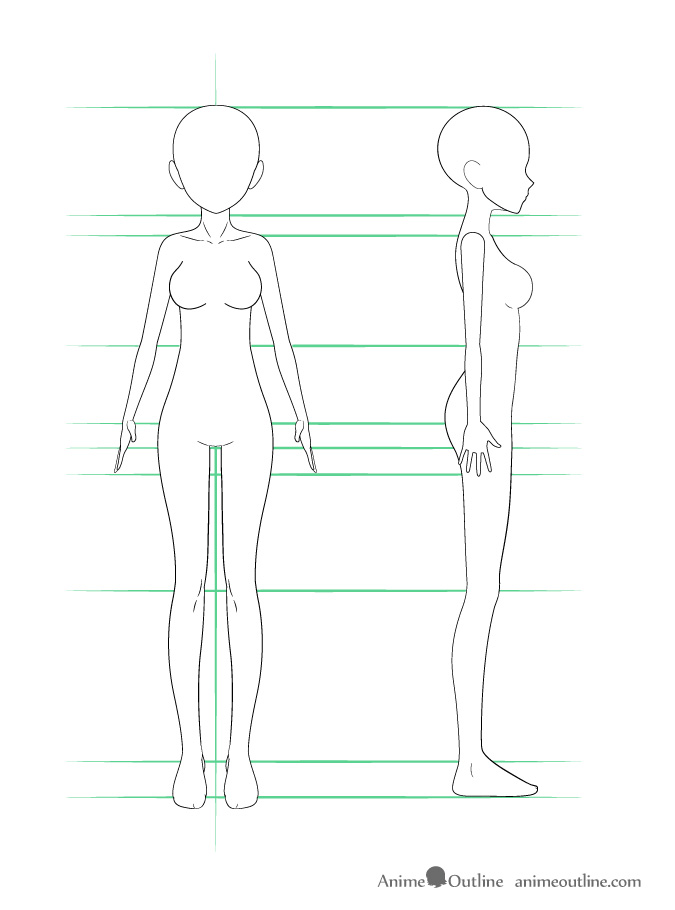
One way to measure the overall size of the body (with the legs) is in relation to the head. In this particular drawing it will be six and a half heads high. As mentioned at the start of the tutorial these kinds of proportions can work quite well for some of the more common/average female anime characters such as high school students and adults.
You may notice that in the above illustration the feet go slightly past the bottom of the measuring line. This is not a mistake but is done to account for “eye level”.
For more on eye level see the following tutorial:
Perspective Drawing Tutorial for Beginners and How it Relates to Anime
In this example the feet are well below the level of the viewers eyes so they will appear to go farther down than they actually are. Measuring the height from the tips of the toes to the top of the head would be similar to measuring your height by stretching a measuring tape from the tips of your toes to the center of the top of your head. The measurement wold be off.
To get the correct measurement in this case you would want to estimate where the heels start and go from there (as is done in the example).
Please note that these are just recommendations for getting a generic anime look. The proportions of anime characters can vary depending on many factors including the style of the artist.
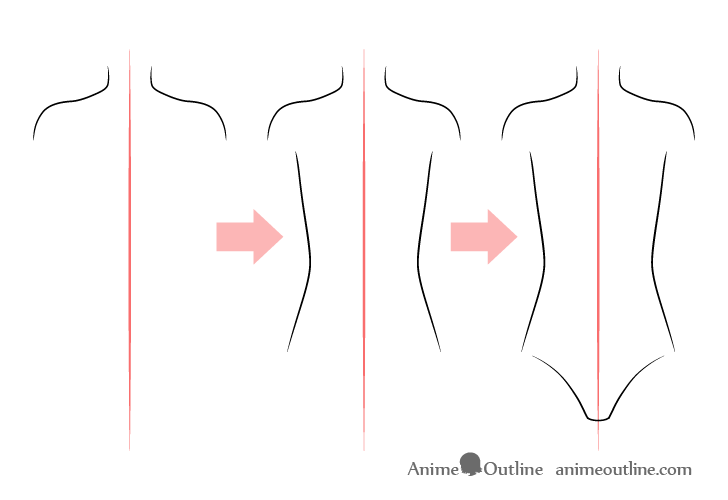
For the actual process of drawing the body start with the neck and shoulders. Afterwards outline each of the sides leaving openings between them and the shoulders for the arms. Overall the body should be shaped a bit like an hourglass where it’s narrower near the middle and gets wider as it goes up and down.
Step 3 – Draw the Upper Part of the Legs
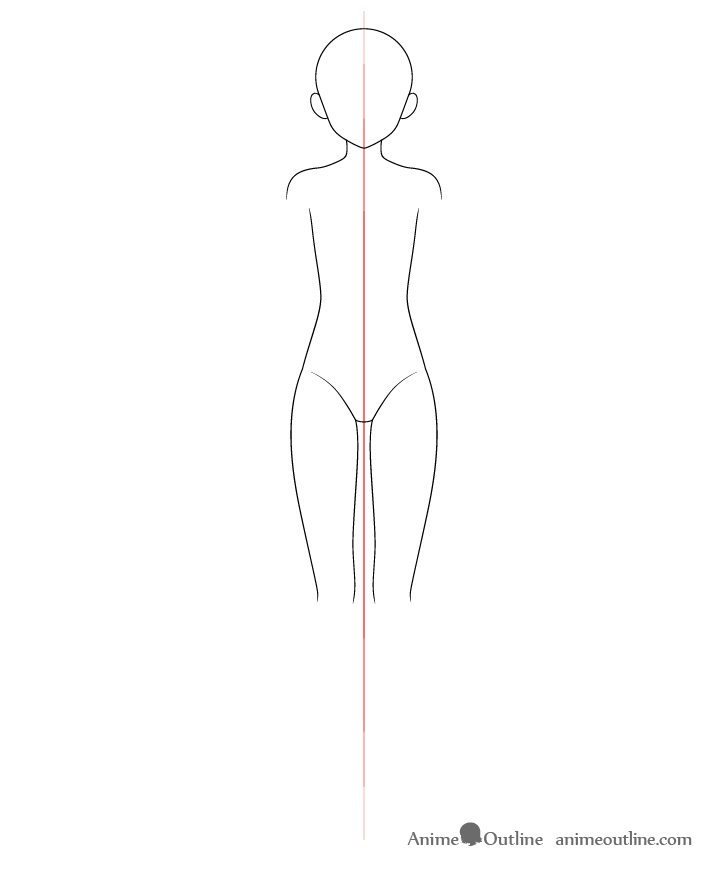
For this step add the upper parts of the legs as shown above. You will want make these wider at the top and narrower as they go down with a bit of a curve in the overall shape of each of them. However, you will again first want to read the explanation below before drawing.
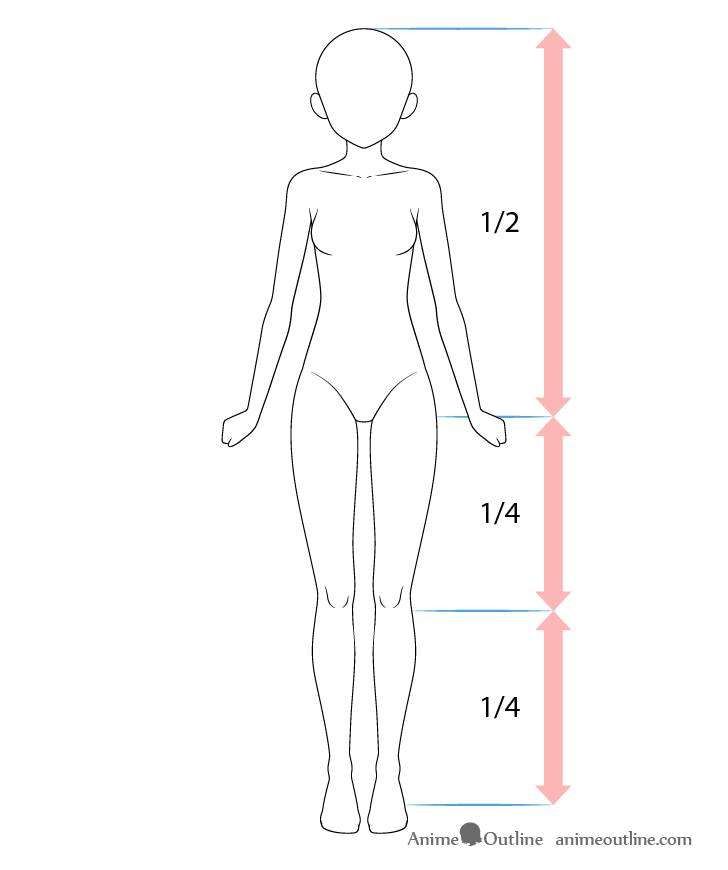
In the above example you can see that the legs are roughly as long as the head and body combined and that the knees are positioned about halfway between the bottom of the body and the bottoms of the feet. Be sure to keep these relations in mind when you draw.
Step 4 – Draw the Lower Part of the Legs
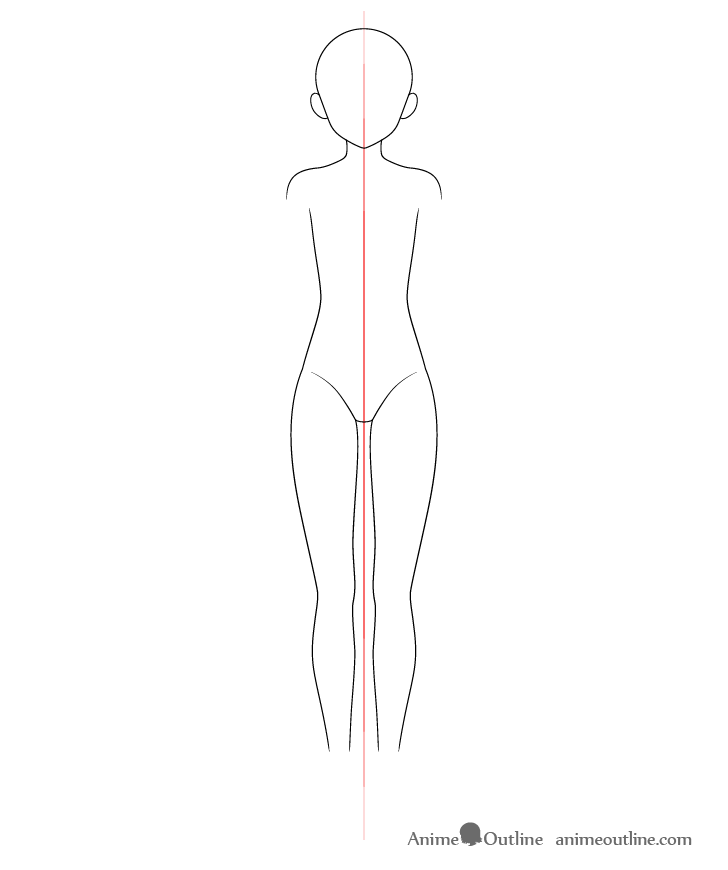
Draw the lower part of the legs in a way where they first get wider as they go down and then get narrower towards the feet. The part where they get narrower as they go down should be taller than the part where they get wider.
Step 5 – Draw the Feet
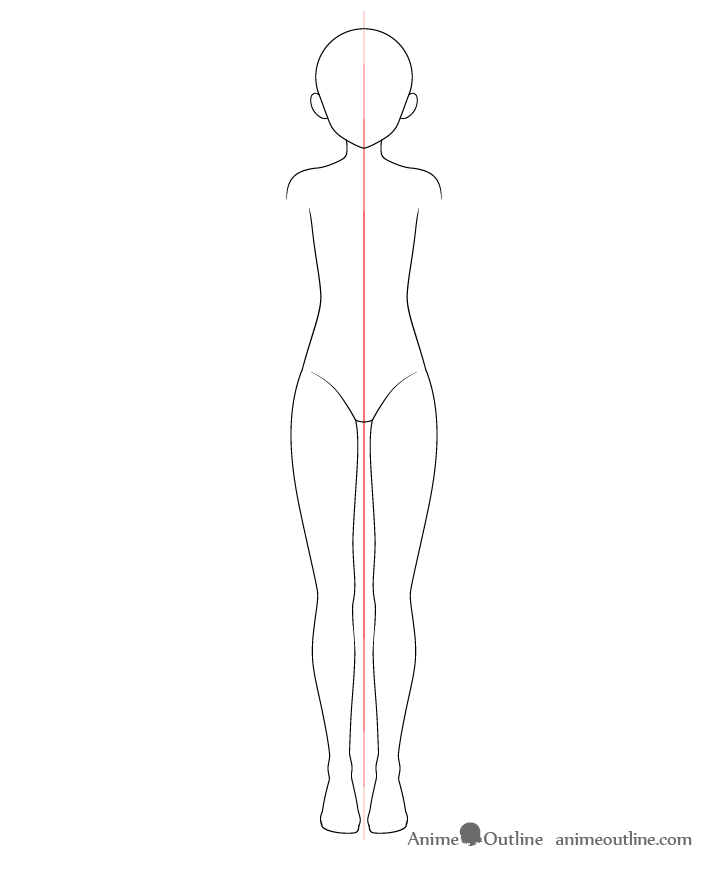
Before adding the feet draw what looks like a pair of bumps on each side of each leg to show the bones that stick out in those areas.
Going down from the “bumps” outline the feet with their shapes getting wider towards the bottom. At this stage draw the toes as one combined shape that’s a bit narrower than the foot (you can see a larger drawing of the feet at the end of step 9).
When done with this step be sure to check your proportions so that they match what was described earlier.
Step 6 – Draw the Upper Part of the Arms
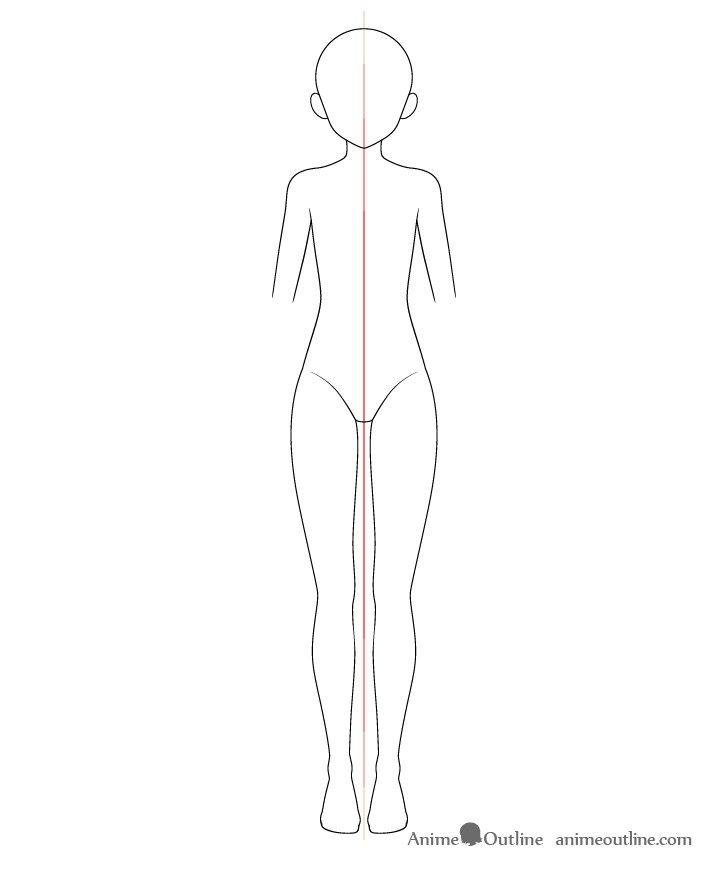
Coming out of the openings between the shoulders and body add the upper parts of the arms. However, once again you should read below before you start drawing.
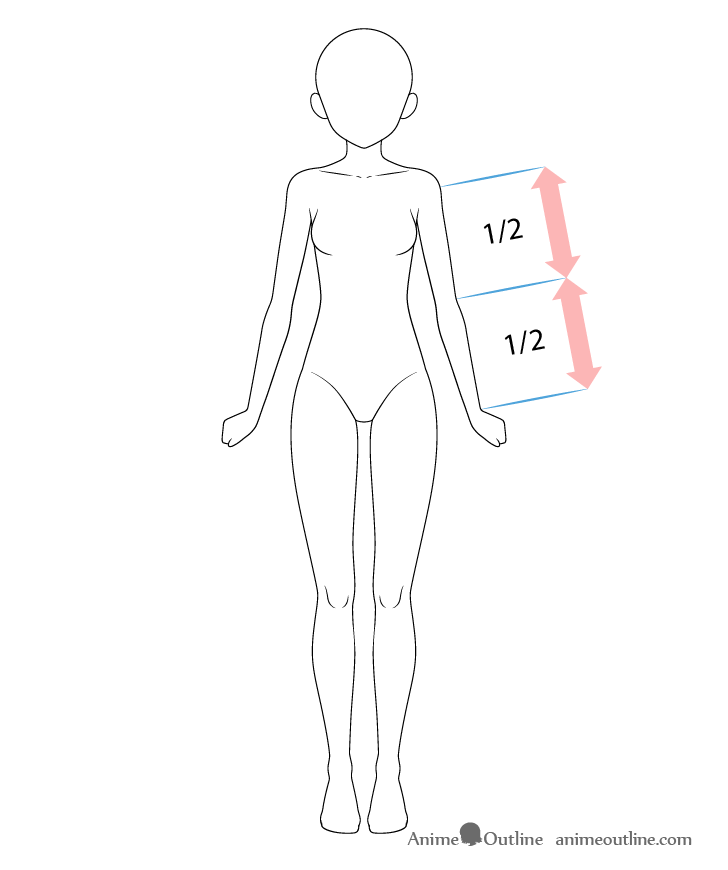
It’s a bit difficult to measure the proportions of the arms. Generally you can make the area from roughly the end of the curve of the shoulder to the part where the arm bends the same length as from the bend to the wrist.
When you draw make the upper part of each arm slightly narrower as it goes down.
Step 7 – Draw the Lower Part of the Arms
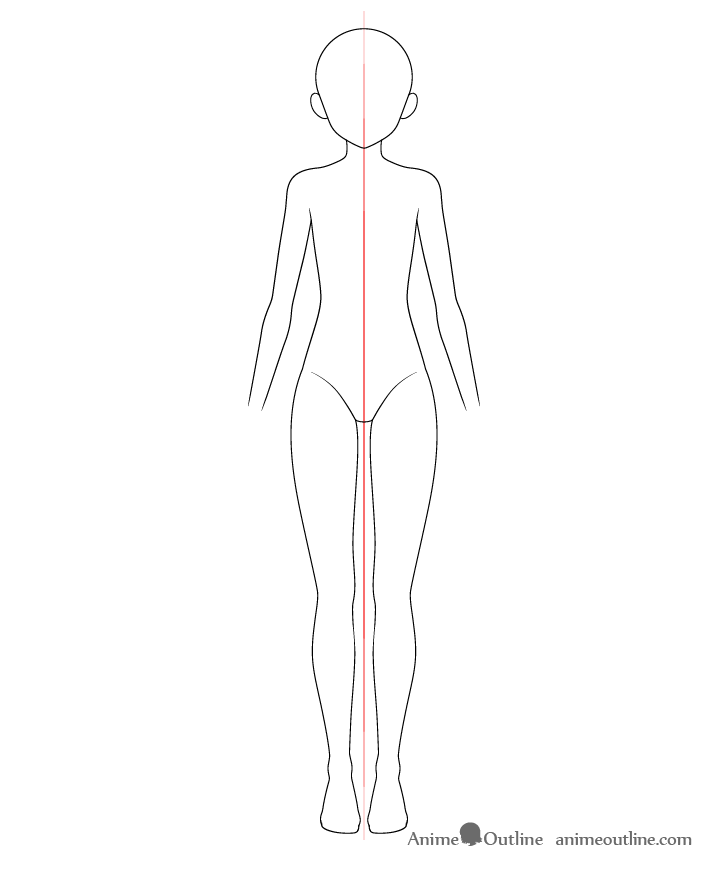
Draw the lower parts of the arms similar to the lower part of the legs where they first get wider as they go down and then get narrower again. The wrists should reach to about the bottom of the body. As in this case the arms are held slightly to the sides they will be a little bit higher up.
Step 8 – Draw the Hands
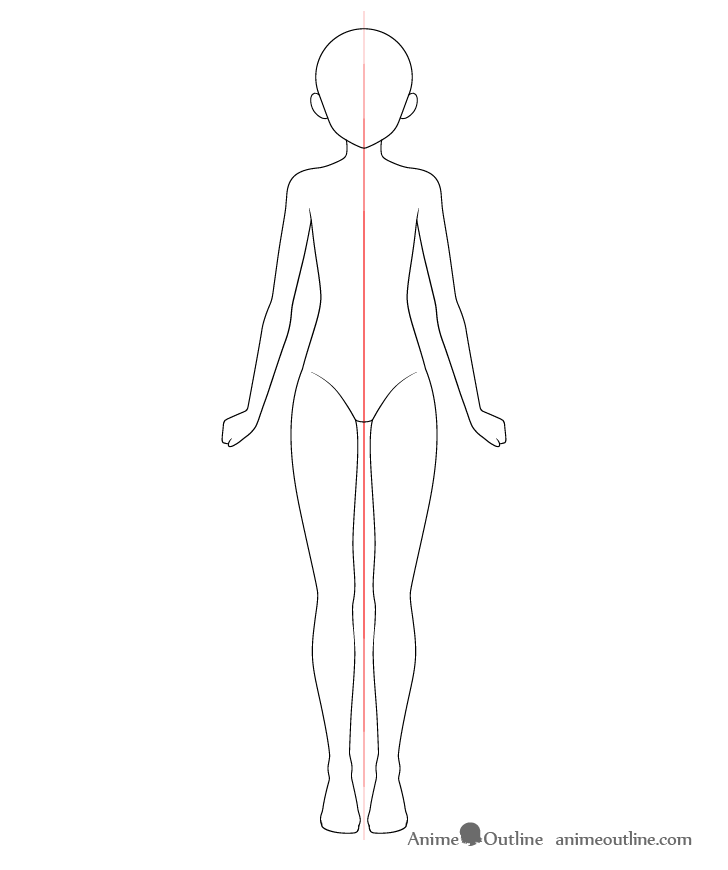
Outline the overall shape of each hand without the smaller details (these will be added later on). In this case the hands will be closed into fists but not clenched. Instead they will point slightly outwards to create a somewhat feminine pose.
Step 9 – Draw the Smaller Parts of the Body
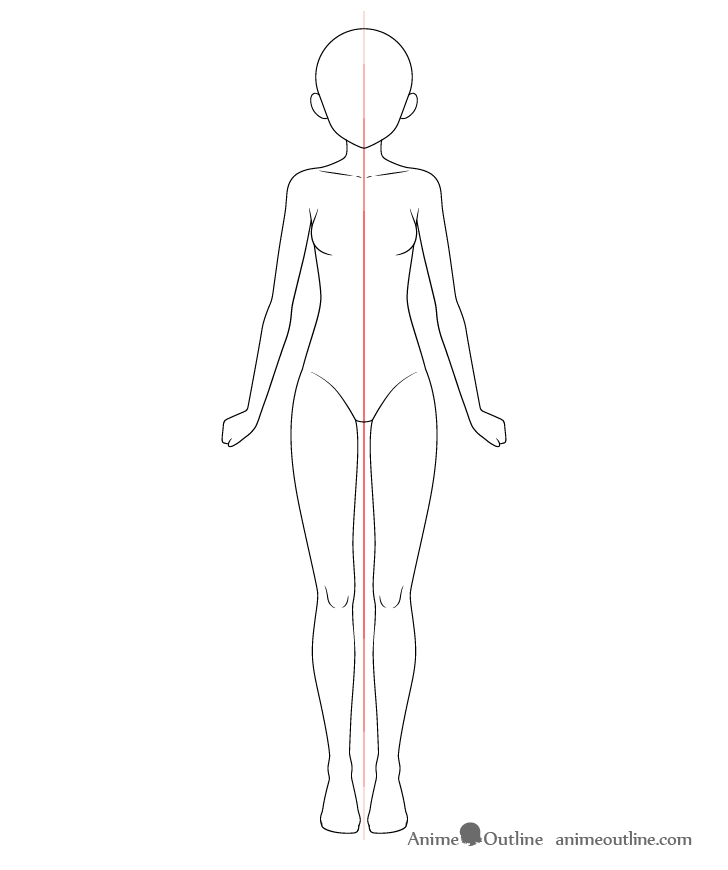
Once you have the overall shape of the body outlined you can add some of the larger details.
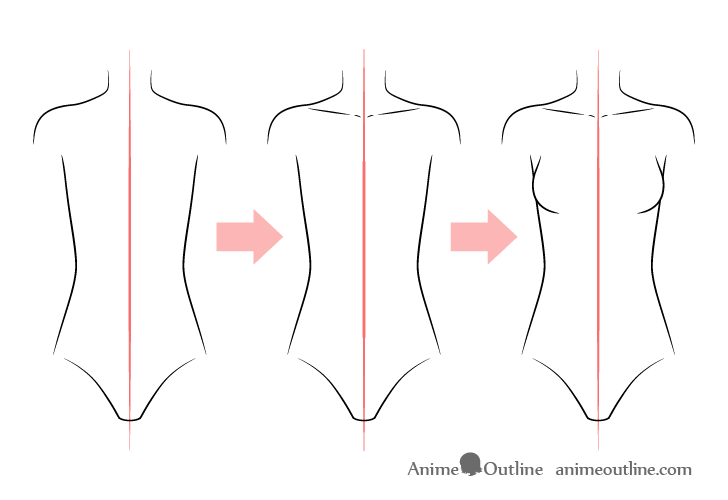
Start with the chest area by adding the collar bones and the breasts as shown above. Draw the collar bones with a little bit of a gap between their inner ends and with their outer ends pointing towards the shoulders.
Draw the breasts just slightly overlapping the sides of the body. You can erase a little bit of the body’s outline when adding them in.
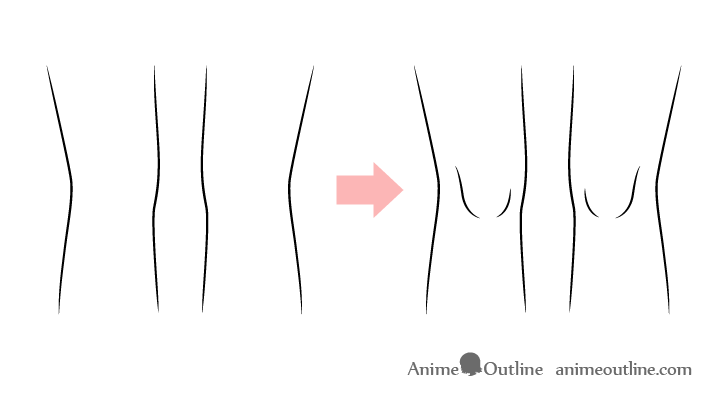
Add the knees by drawing them slightly closer to the inner ends of the legs as shown above.
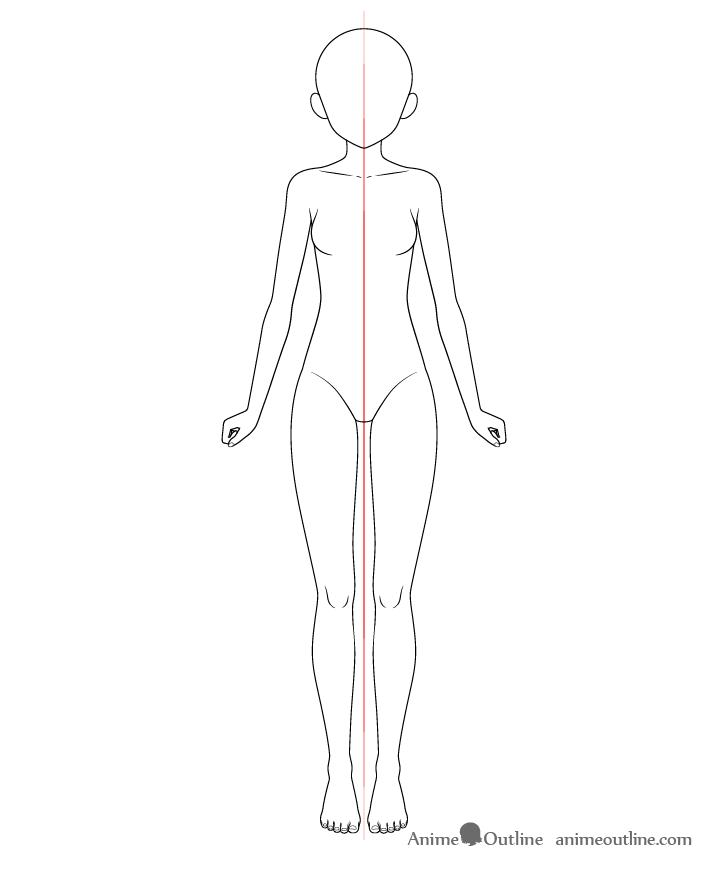
For the next set of details add those of the hands and feet (the fingers and toes).
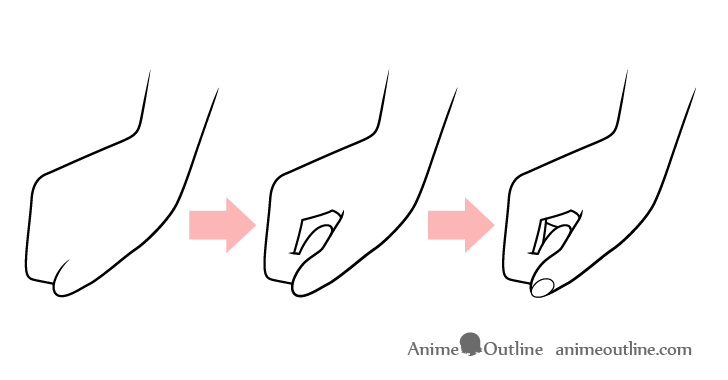
You can see a step by step breakdown of drawing the fingers above. First outline the thumb and the index finger and then show just a hint of the other fingers and the palm.
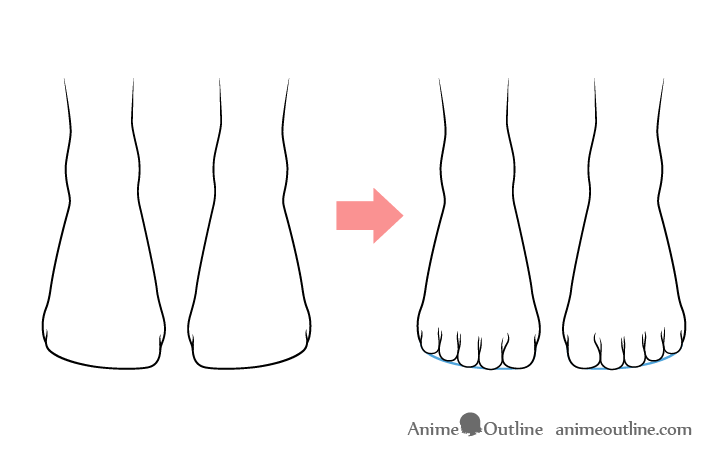
When drawing the details of the feet you use the outline from the earlier step as a guide and then draw the individual toes inside it as shown above.
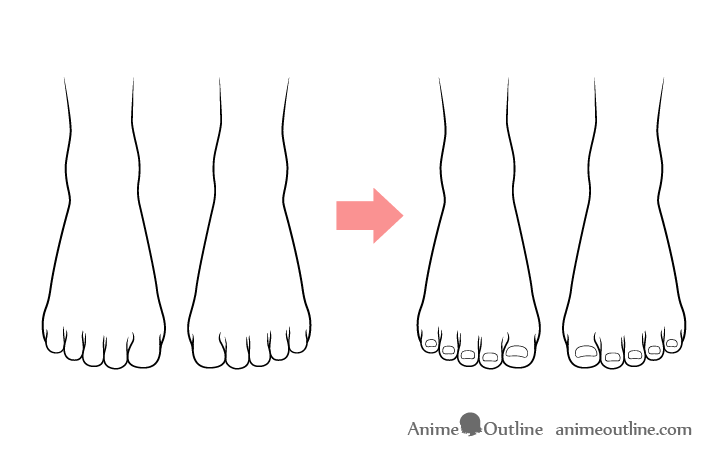
Once you have the toes drawn out you can add the toenails as shown above. Be sure to draw the big toenail slightly higher in relation to it’s toe than the rest to show that the big toe is thicker.
Step 10 – Draw the Face, Hair & Clothes
As the focus of the tutorial on the body drawing the face, hair, swimsuit and shading is optional and will not be covered in very great detail.
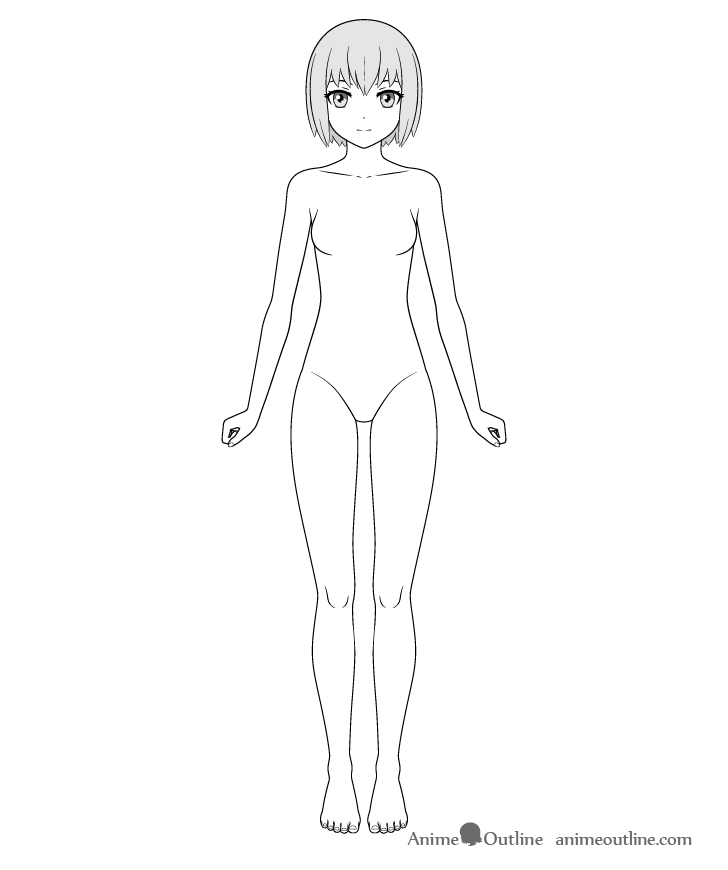
If you do with to draw the above mentioned items you can start with the face and head.
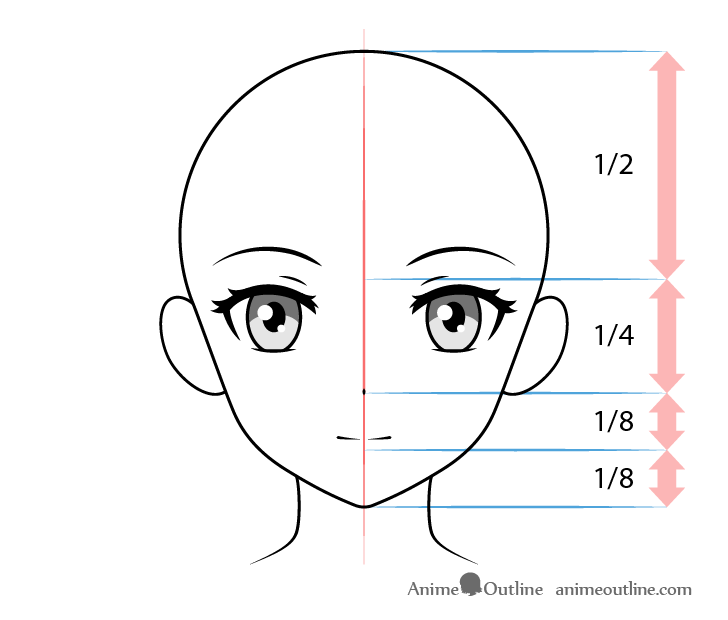
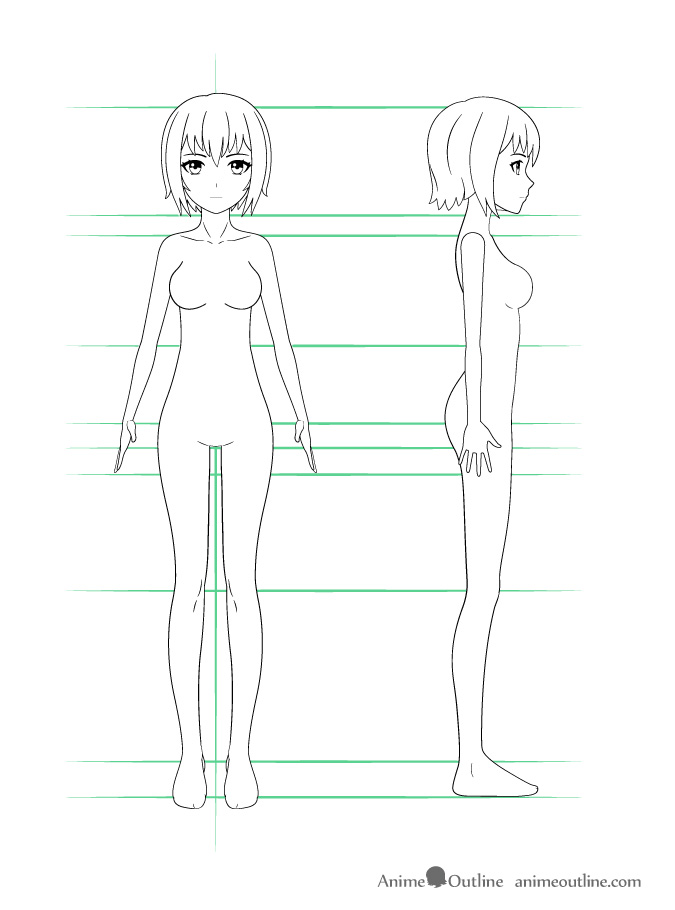
You can see the proportions for this particular character shown above. Place the facial features as follows:
- Eyes – slightly below the horizontal halfway point of the face
- Eyebrows – a little bit above the eyes
- Eyelids – between the eyebrows and the eyes (closer to the eyes)
- Nose – halfway between the top of the eyes and the bottom of the head
- Slightly above the halfway point between the nose and the bottom of the head
For a step by step guide on drawing an anime face you can see the following tutorial:
How to Draw an Anime Girl’s Head and Face
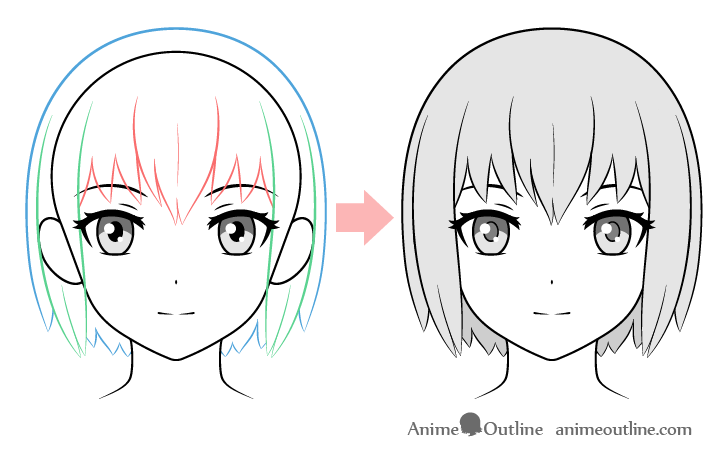
For adding the hair you will want to draw it over top of the head starting with the part shown in red (front section), followed by the green (side sections) and blue (top/background section).
You can erase the parts of the head covered by it once done.
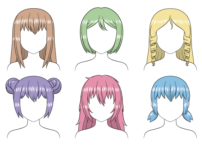
For an explanation of this drawing approach as well as examples of other hairstyles see the following tutorial:
How to Draw Anime and Manga Hair – Female
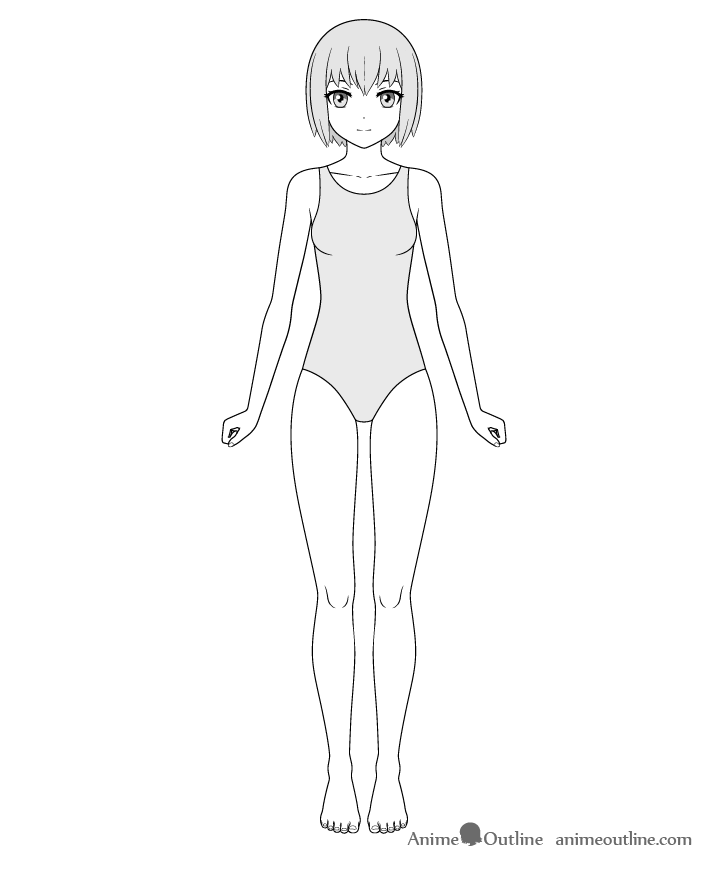
To finish you can add a fairly simple swimsuit as shown above. As swimsuits of this type are generally fairly tight most of it’s shape will be defined by the body. You can simply outline the openings for the neck, arms and legs. You can also give the swimsuit a bit of shading (or color) to make it stand out more.
For a similar tutorial on drawing a cute girl in a more stylized way see the following:
How to Draw a Cute Girl Step by Step Guide
Conclusion
Drawing the full body of an anime character such as this one can be a challenge if you don’t know how to go about it. However, by following the guide outlined in this tutorial you can make the process much easier. The most important thing to keep in mind when drawing the body is the size of each part in relation to the others. Especially the larger body parts such as the head, main body, arms and legs. If the the proportions on these are incorrect the rest of your drawing won’t look right no matter how much effort you put into the smaller details.
If you enjoy tutorials such as this one be sure to also check the following:
- How to Draw Anime Pop Star Girl in 10 Step (Pop Idol)
- How to Draw Anime Muscular Male Body Step by Step
- How to Draw Anime Characters Tutorial
This tutorial has been updated with new artwork. If you are looking for the images form the older version you can find them below.

