How to Draw Anime & Manga Hands Step by Step
This tutorial illustrates how to draw anime and manga hands in different positions and from different views with eight examples in total (four step by step).
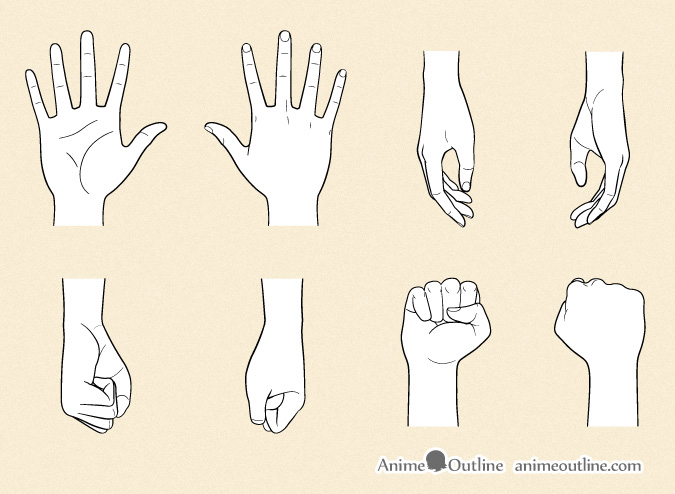
Hands can be a difficult and confusing part of the body to draw even in the less detailed anime/manga style. To help this tutorial provides simple drawing examples along with an explanations of the structure of the hand. It shows the placement of the joints and gives a basic breakdown of their proportions.
Unless drawing digitally it’s recommended that you start the tutorial in pencil as there will be some overlapping lines that will need to be erased in between the different steps. Also, try and keep your initial lines light to make erasing easier. You can darken them once you have all of the major parts of the hand drawn out.
Please note that the breakdown of the drawing process is only shown for one view of each pose as pretty much the same or simpler method can be used for the other views.
For drawing anime hands holding different kinds objects see:
6 Ways to Draw Anime Hands Holding Something
For drawing arms see:
How to Draw Anime & Manga Arms Tutorial
Drawing Anime Hands With an Open Palm
If you are a beginner then you should practice by first drawing the hand with the palm open and fingers extended to get an idea of the proportions. You can also look at photographs other drawings or at your own hands for reference.
Step 1 – Draw the Palm & Base of the Thumb
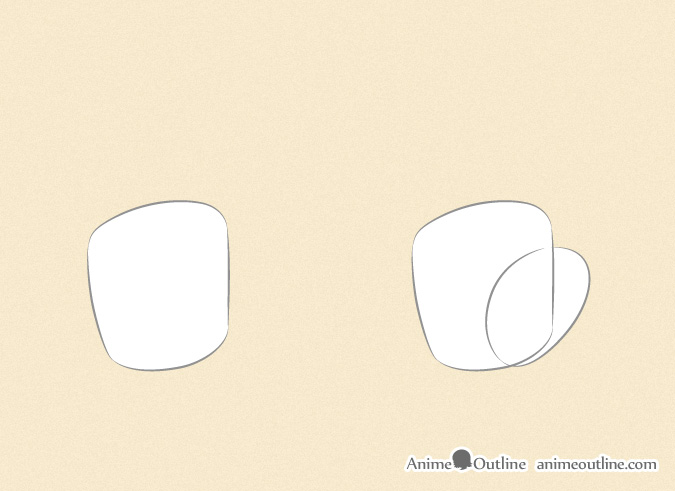
For this view of the hand first draw the rough shape of the palm. Next, draw a rough outline of the base of the thumb. The palm should of course be the larger of the two shapes.
Step 2 – Get the Position of the Fingers/Thumb & Joints
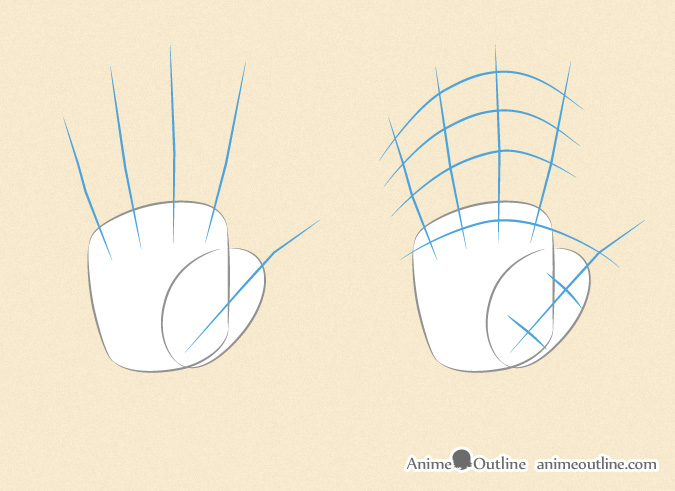
Study the proportions of the fingers. In the first example the lines shows their general direction and bends for this particular pose. The second set lines shows the position of the joins (where the lines overlap) and the end of the fingertips (last curved line).
Step 3 – Proportion and Outline the Fingers & Thumb
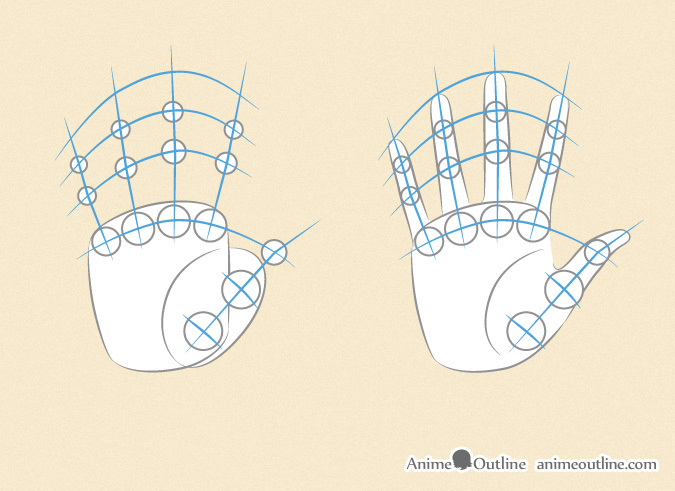
It’s important to note that the first set of joints (at the base of the fingers) actually cuts into the palm.
The middle finger and the palm should be close in length. The tip of the thumb if drawn close to a 45 degree angle to the hand should roughly reach to the knuckle bone of the index finger.
Each finger consist of three parts with the distance from the knuckle to the first join being the longest and the distance from the last join to the tip being the shortest.
The first joint of the thumb is actually near the base of the palm and is nearly invisible. The first visible joint is actually the second.
When drawing the outlines the fingers the middle finger should be the longest and thickest. The index and ring fingers should be slightly shorter and thinner and the little finger should be the shortest and thinnest.
Step 4 – Clean Up & Finalizing the Open Palm Hand Drawing
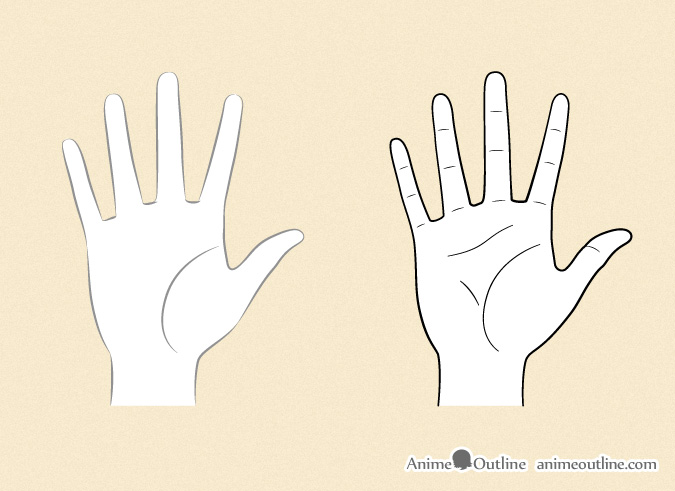
Once you have the fingers outlined erase any extra lines from the previous steps and add a little bit of the arm to the base of the palm. Next, draw some creases along the palm, fingers and thumb. The fingers will usually have these along their base as well as along the second and third joint. Also, add one around the third joint of the thumb. Afterwards, draw two creases along the palm as shown above. Add one as a small curve branching out from the crease that define the base of the thumb and one as a “wave” slightly below the base of the fingers.
Drawing Anime Hands Side View
This is a difficult view to draw but a very common position of the hand.
Step 1 – Draw the Side View of the Palm & Thumb Base
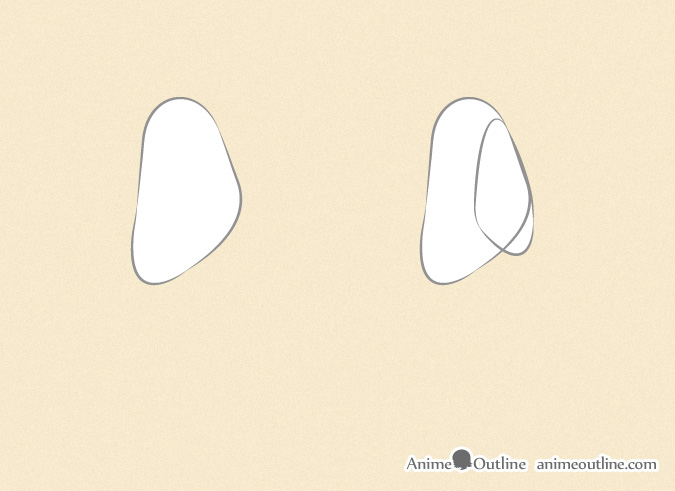
First draw the hand’s overall shape without the thumb or fingers. Next, draw the shape of the thumb’s base overlapping it’s outline.
Step 2 – Proportion & Draw Index Finger, Middle Finger & Thumb
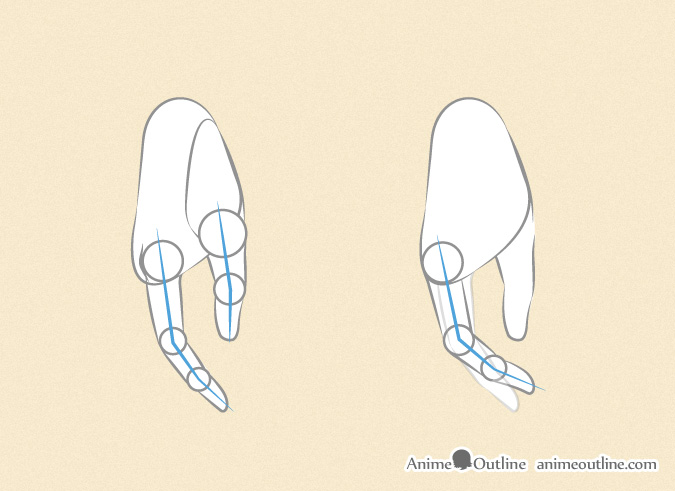
To help you better understand the positions of the fingers each one is fully drawn out in the examples (even the parts that are hidden). You do not need to do this but it is something to keep in mind. Being aware of the positions of the hidden parts of each finger can help you draw the parts that are visible. For example if you can only see the tip of the little finger but you don’t consider the rest of it’s length you can end up drawing that part too far up or down the hand.
Start drawing the fingers in this pose with an outline of the index finger. Afterwards, add the visible part of the middle finger.
Step 3 – Proportions & Draw the Ring & Little Finger
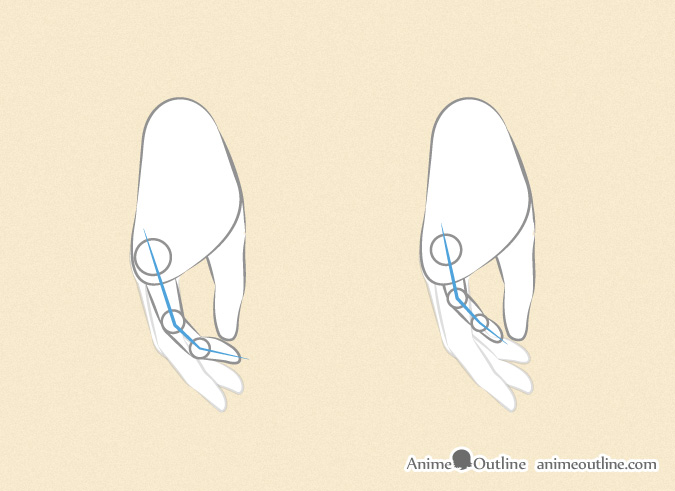
Draw the visible parts of the ring finger and little finger.
Step 4 – Clean Up & Finalizing the Side View Hand Drawing
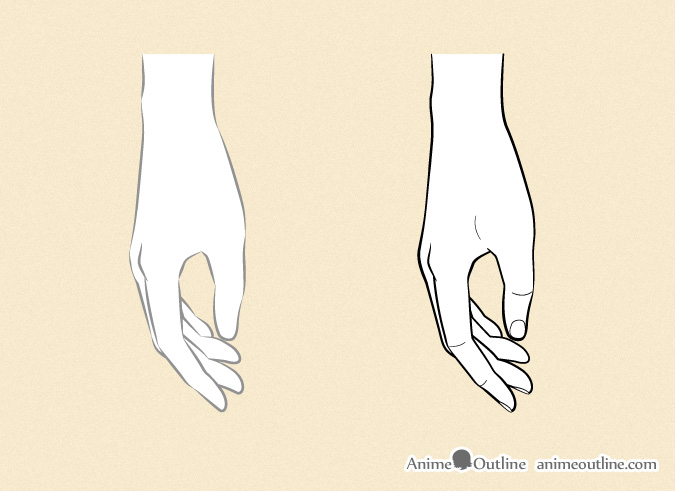
Clean up the drawing and add the fingernails followed by the the wrinkles/creases around the finger joins and thumb.
For more on drawing fingernails see:
How to Draw Fingernails 6 Different Ways
Drawing Anime Hands Closed Palm Side View
This position of the hand would be used for something like holding a grocery bag. It’s close to a fist but not quite the same.
Step 1 – Draw the Overall Shape of the Palm & it’s Side
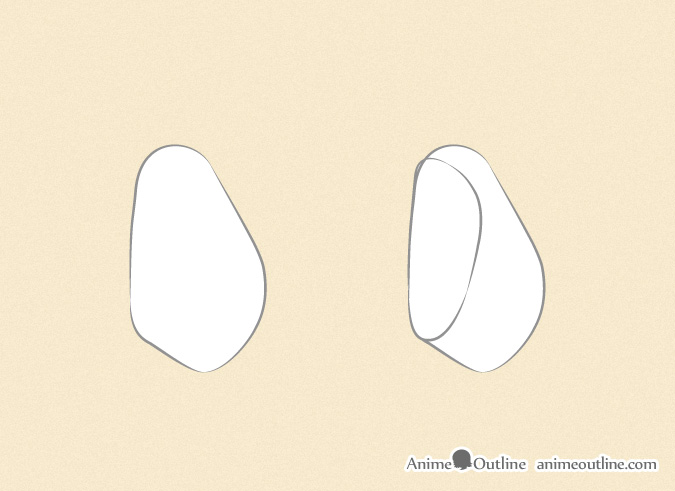
Draw the overall shape of the whole hand in this position. Next, draw the shape of the side view of the palm.
Step 2 – Draw the Overall Shape of the Fingers & Proportion the Little Finger
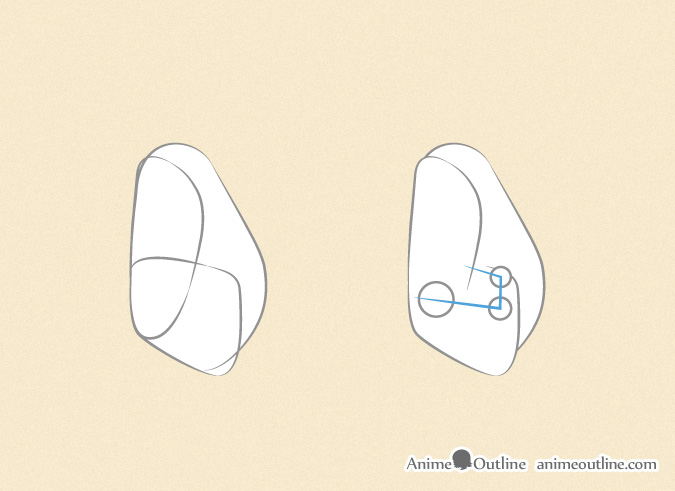
Draw the overall shape of the fingers and then get the proportions for the little finger (as it’s the one in the front).
Step 3 – Draw the Individual Fingers
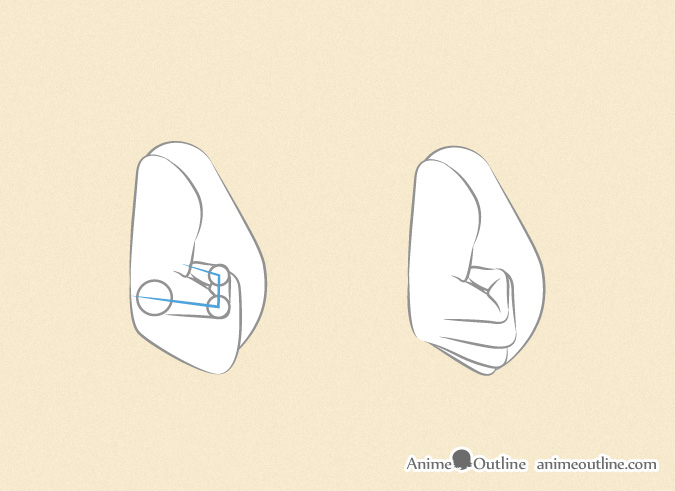
If you need a better understanding of how to draw the rest of the fingers (following the pinky) in this view you can use the same method as in Steps 2 – 3 of the previous example.
Step 4 – Proportion & Draw the Thumb
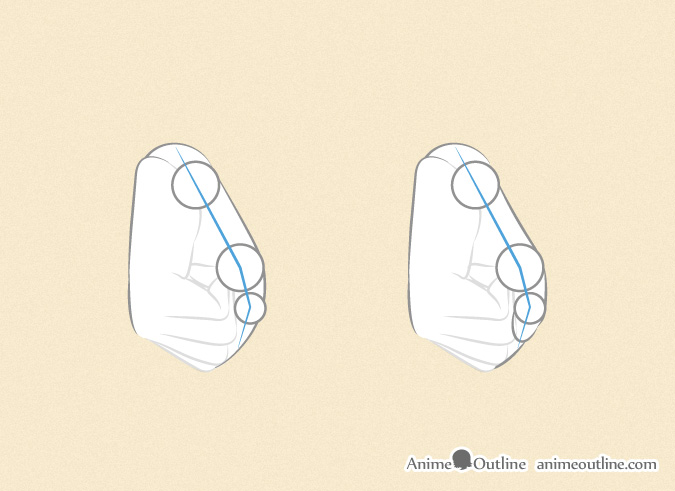
Get the proportions for and draw out the thumb.
Step 5 – Clean up & Finalize the Closed Palm Hand Drawing
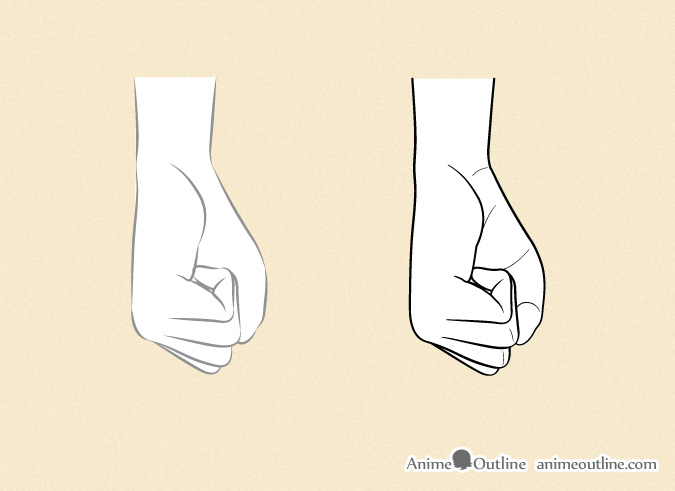
Clean up your drawing and add the creases wrinkles of the hand.
Drawing an Anime Fist
Step 1 – Draw the Shape of the Fist & Fingers
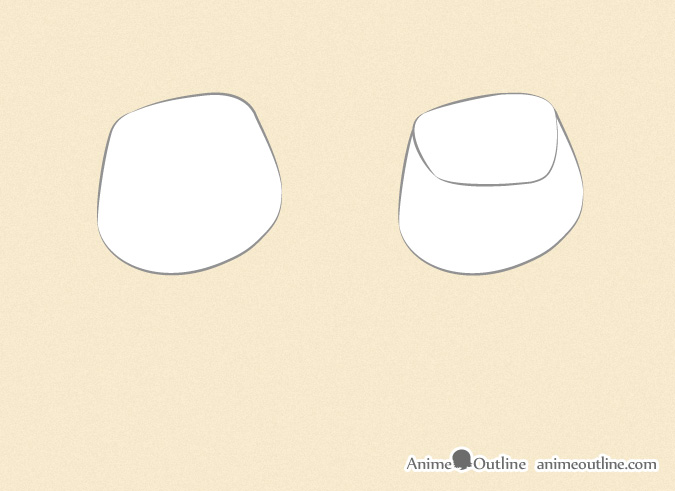
Draw a rough overall shape of the fist and afterwards draw the combined shape of the fingers.
Step 2 – Draw the Base of the Thumb & Get It’s Proportions
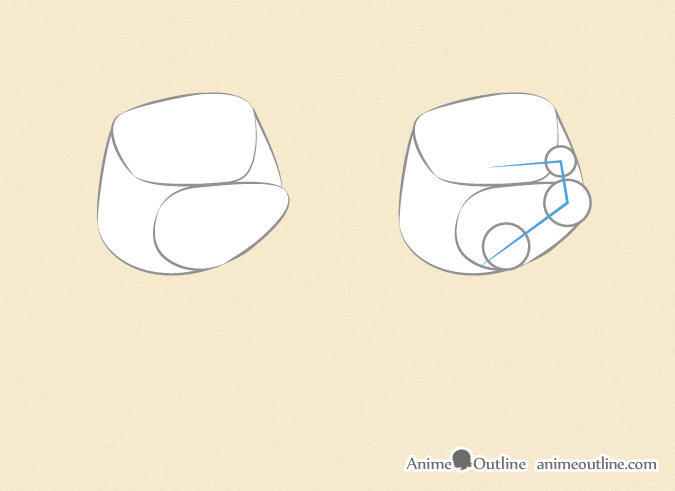
Draw the shape of the base of the thumb. The position of it’s joins (for this particular pose) is shown in the example.
Step 3 – Draw Thumb & Proportion & Draw the Fingers
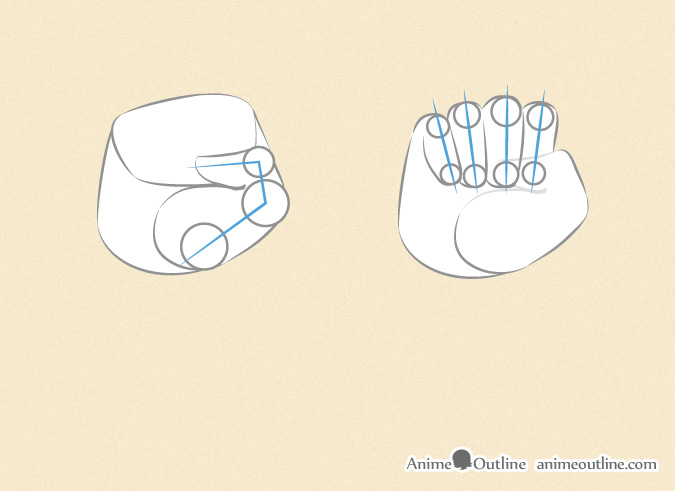
Draw out the rest of the thumb. Draw the fingers slightly thicker than normal (squeezed) to show that the fist is clenched. Also, be aware that in a clenched fist the fingers fan out slightly in a direction away from the base of the thumb.
In this particular view the location of the knuckles is not very important but the position of the other finger joints is shown above.
Step 4 – Clean up & Finalize the Fist Drawing
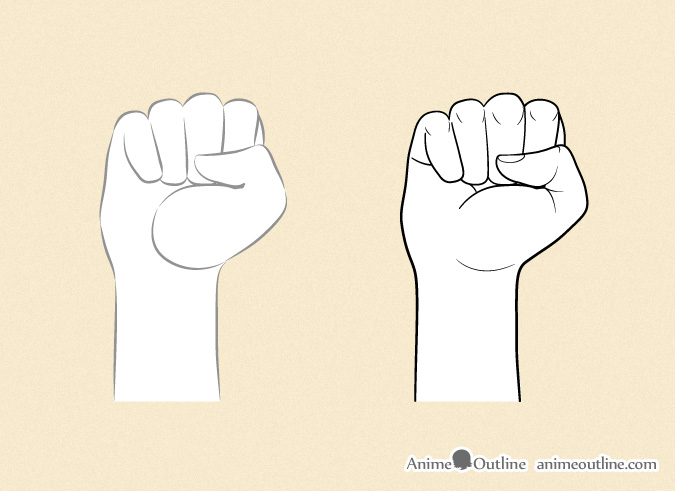
Add a little bit of the arm at the base of the palm and clean up any excess lines. You can then add the folds, wrinkles and creases around the joints.
Drawing Anime Male and Female Hands
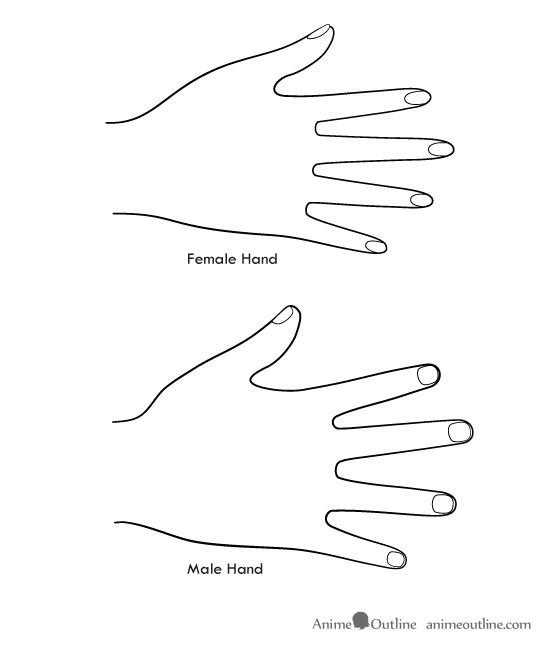
Anime male and female hands are often very similar. However, when drawing close ups there are a few differences. Female hands are usually more slender and curvy with long fingernails. Male hands are usually bigger in comparison.
For different ways to draw fingernails see:
How to Draw Fingernails 6 Different Ways
Simplified Anime Hands
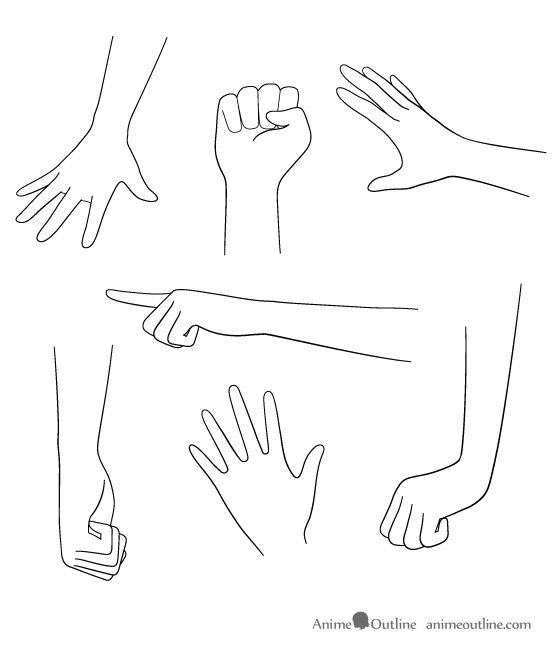
When drawing anime hands you don’t always need to include all of the details. Sometimes a basic outline of the main feature of the hand is enough. For example if you are drawing a character that is in the background you don’t need to draw the fingernails. You can see some examples of various hand poses drawn in such a way in the example above.
Conclusion
It takes a lot of practice to be able to draw properly structured hands in different views. If you are a beginner artist quite often your drawing may not come out the way you want them to but don’t get discouraged, hands are difficult to draw. If you practice on a regular basis you can improve. There is of course also this guide which provides quite a bit of information on how to draw hands in some of their most common poses.
Hopefully you found the tutorial helpful as it was very time consuming to create.
For more on drawing hands also see:
- How to Draw Hand Poses Step by Step
- How to Draw a Handshake Step by Step
- How to Draw Hands Holding Chopsticks Step by Step
- How to Draw a Thumbs Up (6 Easy Steps)

