How to Draw Anime Pigtails Hair
This tutorial shows how to draw anime hair with a pair of pigtails. It consists of six steps with detailed illustrations for each of them as well as a line by line drawing video.
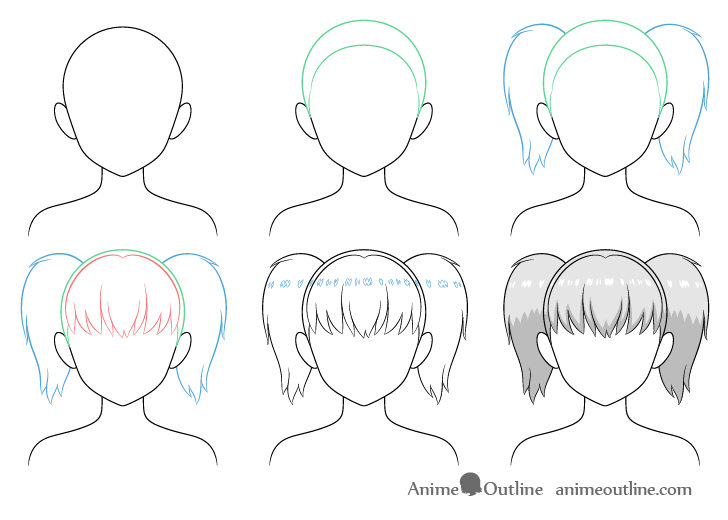
Pigtails are a very common hairstyle in anime and manga, especially for younger characters. It’s also a fairly easy hairstyle to draw, especially with the clear breakdown provided in this tutorial. You can see it’s main stages in the preview image above but there are additional illustrations in some of the steps.
Unless drawing digitally you should start the tutorial in pencil and make light and easy to erase lines as you will need to do some erasing in a few of the steps. You can darken your lines later on (before shading).
For drawing a different style of of pigtails see:
How to Draw Anime Short Pigtails Hairstyle
Above is the video version of this tutorial where the pigtails are drawn line by line. You can watch it and then read the more detailed instructions below.
If you liked the video please be sure to leave a like and to subscribe to the AnimeOutline channel. Your likes and subscriptions are very helpful and important in insuring the videos are seen by more people.
Step 1 – Make an Outline Drawing of the Head & Shoulders
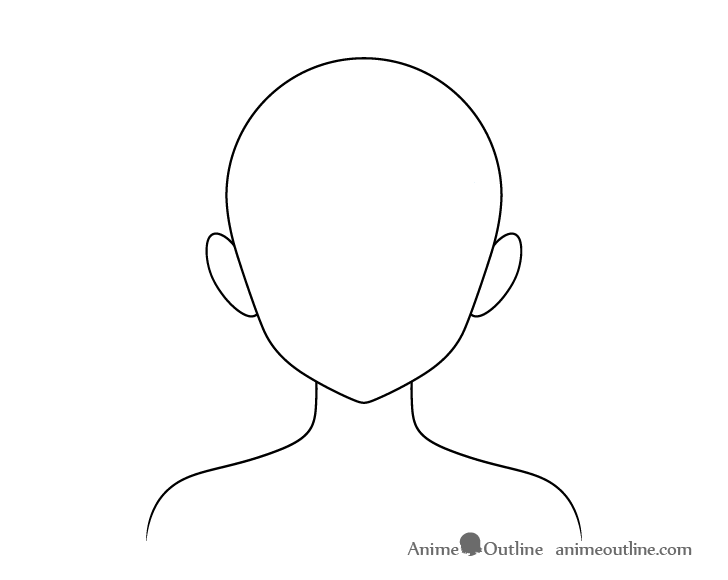
Before starting on the the hair make a simple outline drawing of the head, neck and shoulders. As this tutorial is focused on the hair it will not go too much into drawing these.
For a detailed explanation of the structure of an anime/manga head see the following guide:
How to Draw an Anime Face (Structure & Proportions)
Step 2 – Draw the Hairline & the Pulled Back Hair
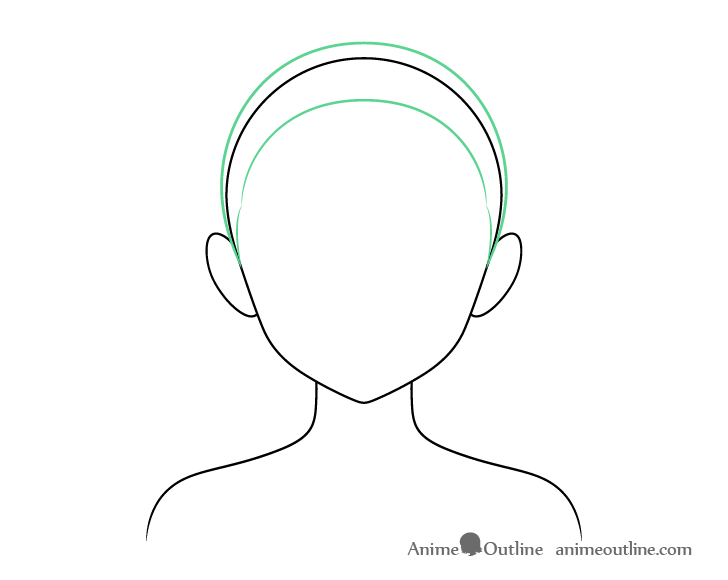
As with most hair drawing tutorials here on AnimeOutline the hairstyle in the examples will be split up into three sections, each shown in a different color just to make it easier to distinguish between them. You can however just draw everything in regular pencil.
For more on this approach see:
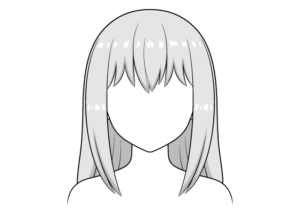
How to Draw Anime and Manga Hair – Female
Begin by drawing the hairline and the pulled back part of the hair. You should at first draw as though the area shown in green is transparent. This way you will be able to see just how much volume you are giving the hair. In this case it should be very little as it’s being pulled.
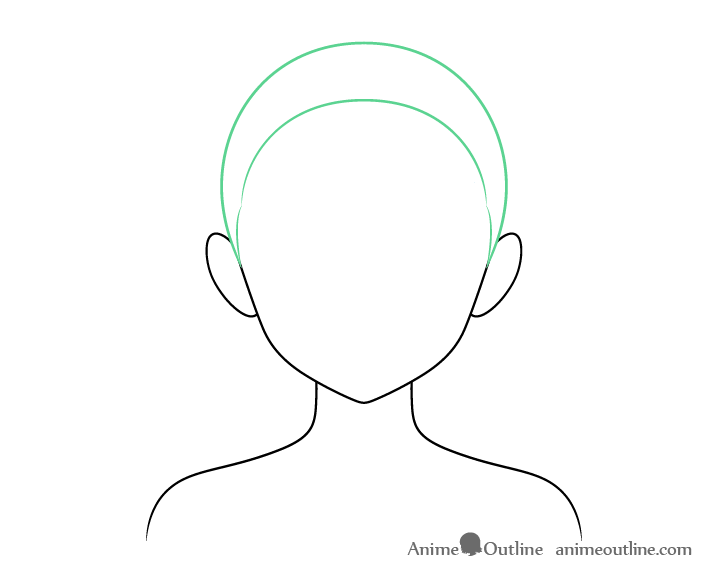
Once you have this hair section outlined you can erase the part of the head that it covers.
Step 3 – Draw the Pigtails
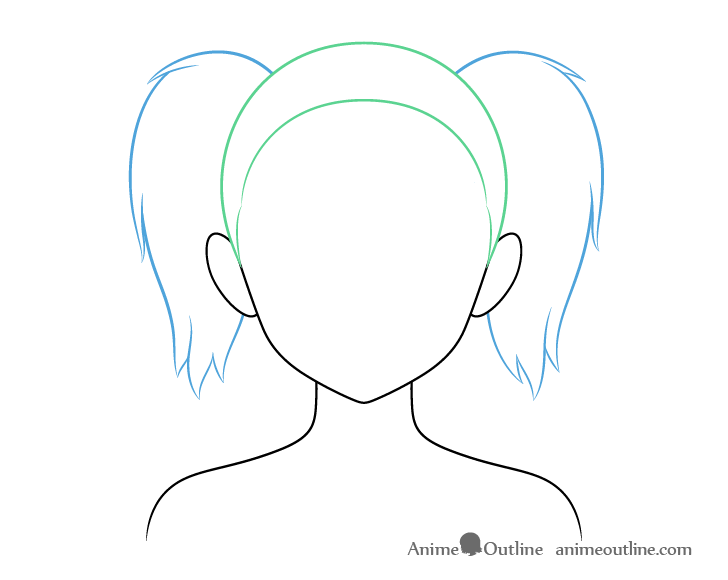
Coming out from behind the head add the pigtails. Draw them curves at the top (as the hair bends downwards) and then give each one a bit of a wave in it’s shape. Draw in a way where the pigtails first curve inwards (towards the head) and then outwards (away from it).
Make the pigtails thicker near the top and thinner near the bottom with splits on their ends. You can also add in a few small clumps of hair sticking out of them higher up. These clumps and splits will help make the pigtails look more natural. You also want each one to be slightly different from the other so that they are not perfectly symmetrical. At the same time you want them to be balanced (close in size and shape) for a nicer looking drawing.
Step 4 – Draw the Hair Along the Forehead
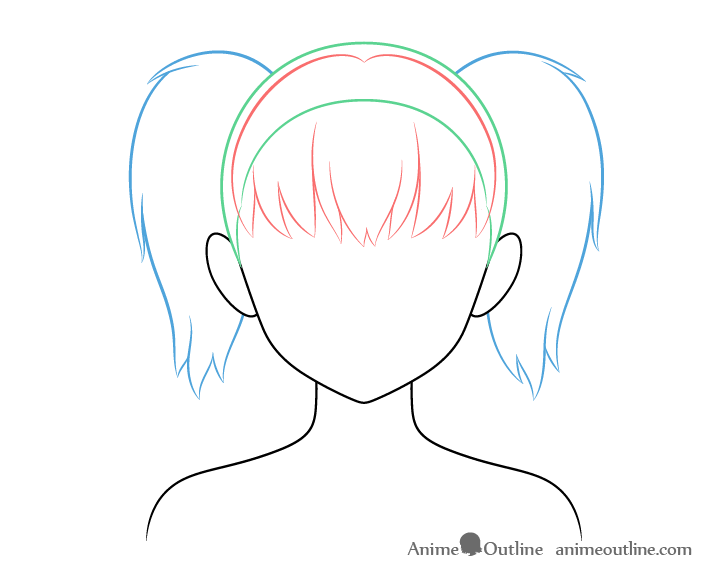
For the last part of the hair add it’s front section (shown in red). This will be the hair that is not pulled back by the pigtails and is left hanging down over the forehead. It can be given different shapes depending on how it’s combed and cut or not be drawn at all (if all of the hair is pulled back). Similar to the first section (shown in green) you can at first draw this part as though it’s transparent.
In this example the forehead hair will have a fairly natural look (not neatly combed or trimmed). Draw it as a series of clumps of slightly different shapes and sizes.
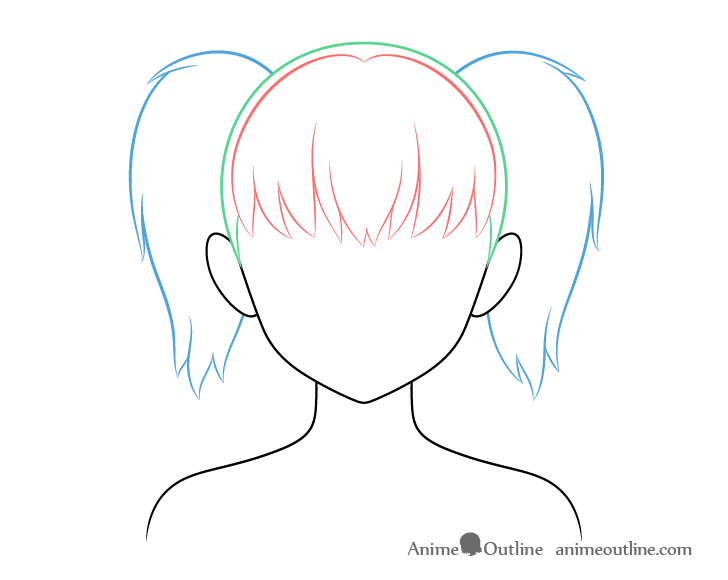
You can erase the part of the hairline covered by this section once done.
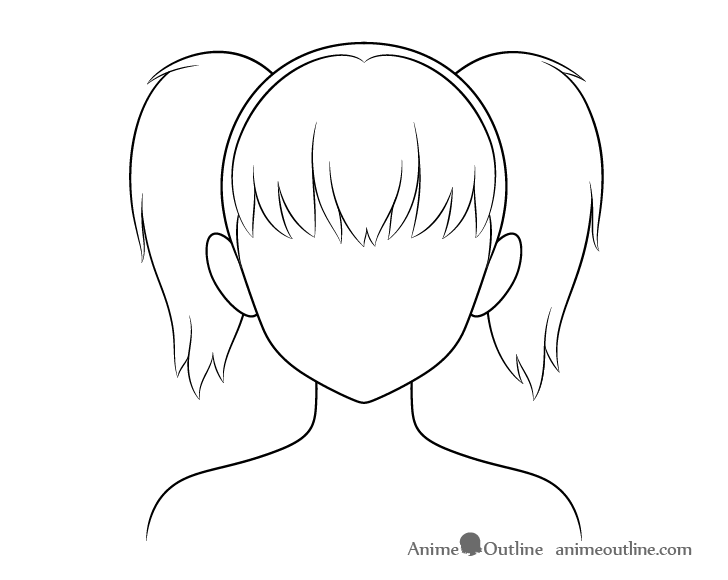
Once you have all part of the hair drawn out (and are happy with how things look) you can trace over your drawing with darker lines.
Step 5 – Outline the Hair Highlights
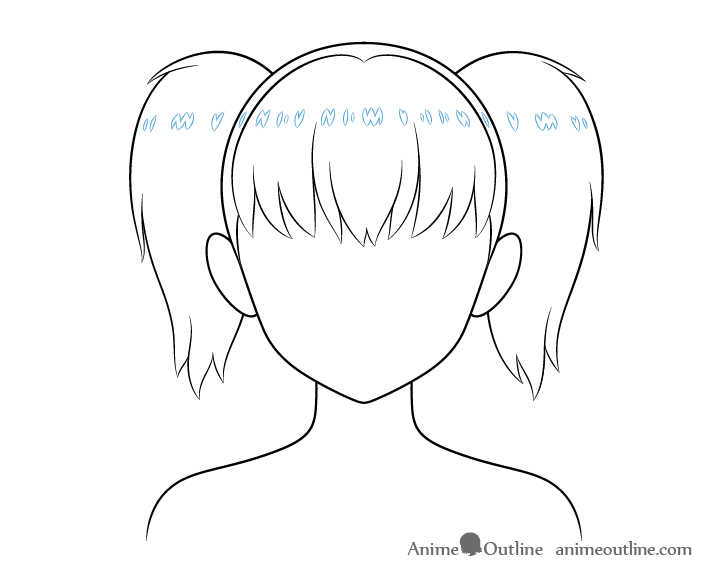
Before shading you can outline a series of little highlights along the upper part of the hair. This will show slight reflecting from it’s smooth surface and help give it a more shiny appearance.
Alternatively you can create the highlights as you shade or add them in over top of the shading if drawing digitally (usually in a new layer).
For other styles of anime and manga hair highlights see:
Different Ways to Draw Anime Hair Highlights
Step 6 – Add Shading to Finish the Pigtails Drawing
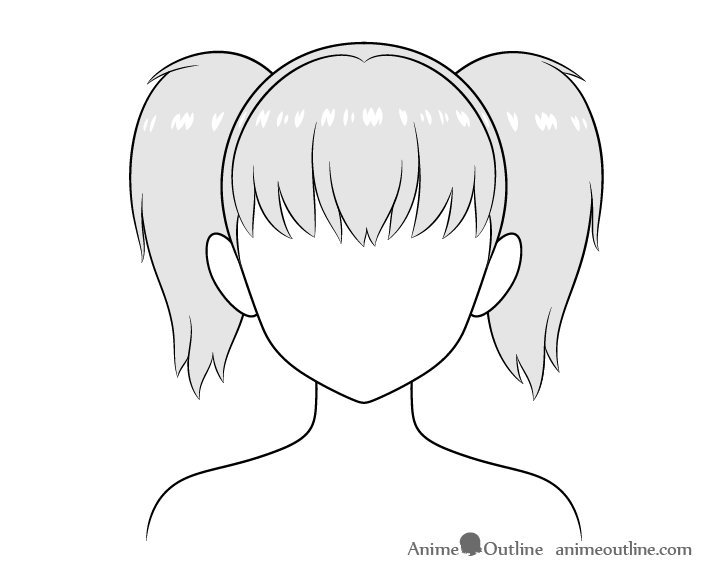
After adding the highlights you can shade the hair a light grey or make it just about any color you like.
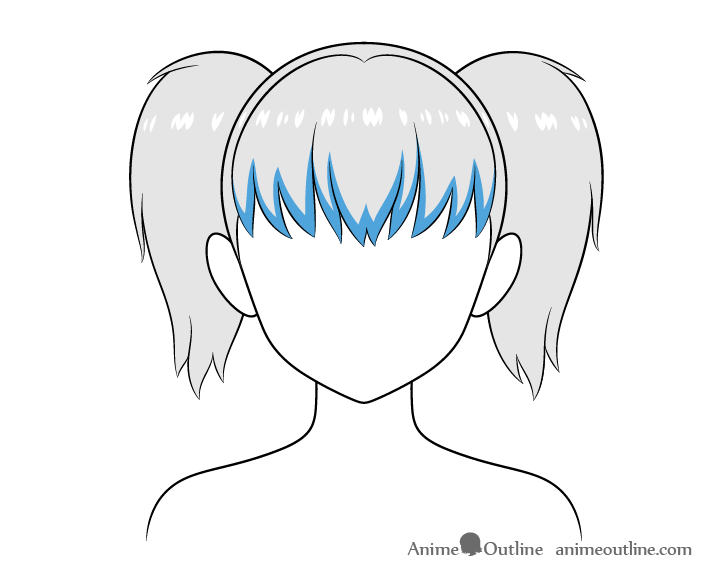
Once you shade/color the hair, add the shadows. In this example the shadows are placed in a fairly generic setting that you tend to fight in most anime/manga scenes where the character is in a well lit environment (with most of the light coming from above).
First, shade the forehead part of the hair by adding shadows along the bottoms of the hair clumps.
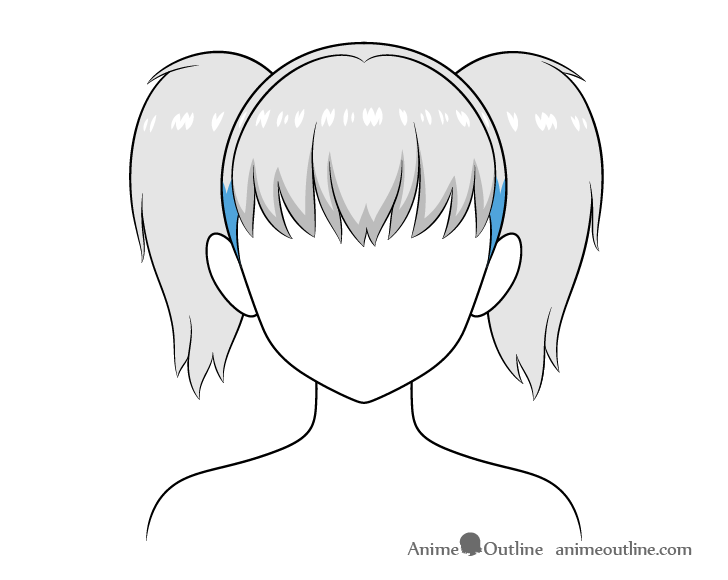
Next, add a shadow on each side of the pulled back back part of the hair.
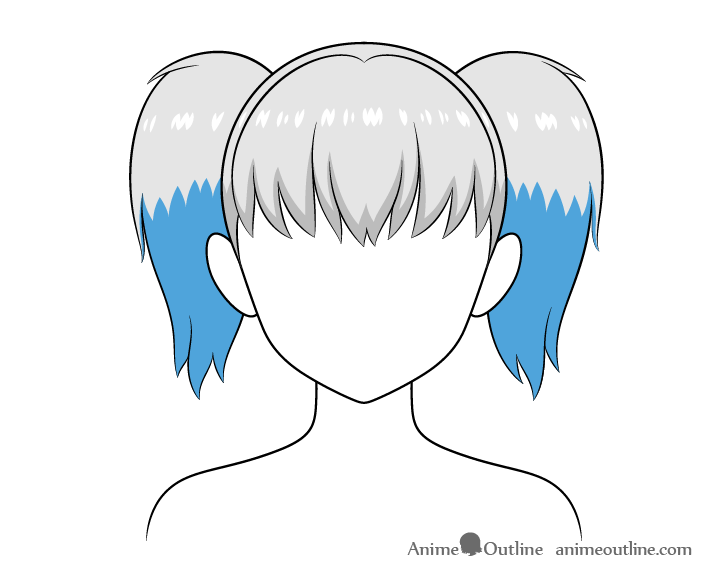
Finally, add shadows along the lower parts of the pigtails (roughly at the level where they start to curve inwards). In this case the shadows will be created by the wider upper parts of each pigtails casting a shadow on it’s narrower lower part.
You can define the top of each shadow as a series of zigzags to help show an uneven surface (such as the folds in the hair).
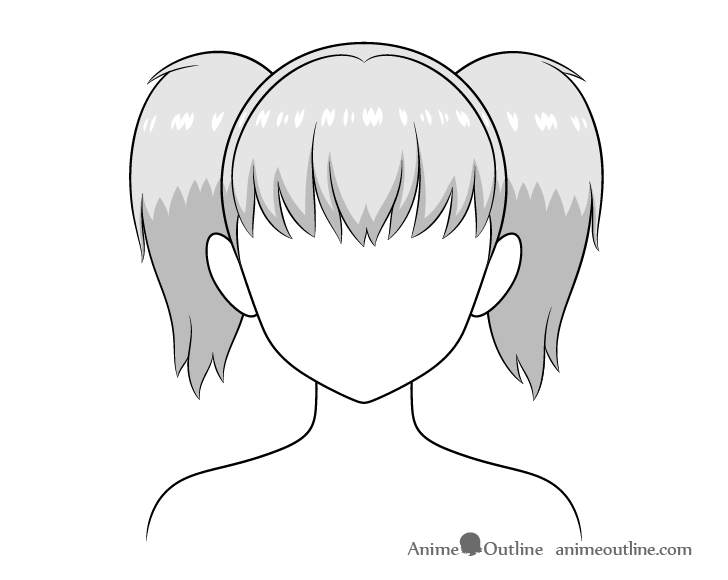
Once all of the shadows are in place you should have a finished drawing of an anime/manga style pair of pigtails.
Conclusion
Pigtails are a fairly easy hairstyle to draw as it’s quite simple to break it down into several parts. Although the same can be done for other types of hair the approach is particularly obvious for this style because each of it’s sections is so well defined.
For drawing other kinds of anime/manga hair see the following tutorials:
- How to Draw an Anime Ponytail (6 Steps)
- How to Draw Anime Hair Buns Step by Step
- How to Draw Messy Anime Hair
- How to Draw Anime “Hime Cut” Hairstyle
- How to Draw Anime Hair Over One Eye
- How to Draw Curly Anime Hair

