How to Draw Wet Anime Hair Step by Step
This tutorial shows how to draw wet anime and manga style hair with a step by step illustrated instructions. It also provides overlapping examples of how drawing wet hair differs from drawing normal/dry hair.
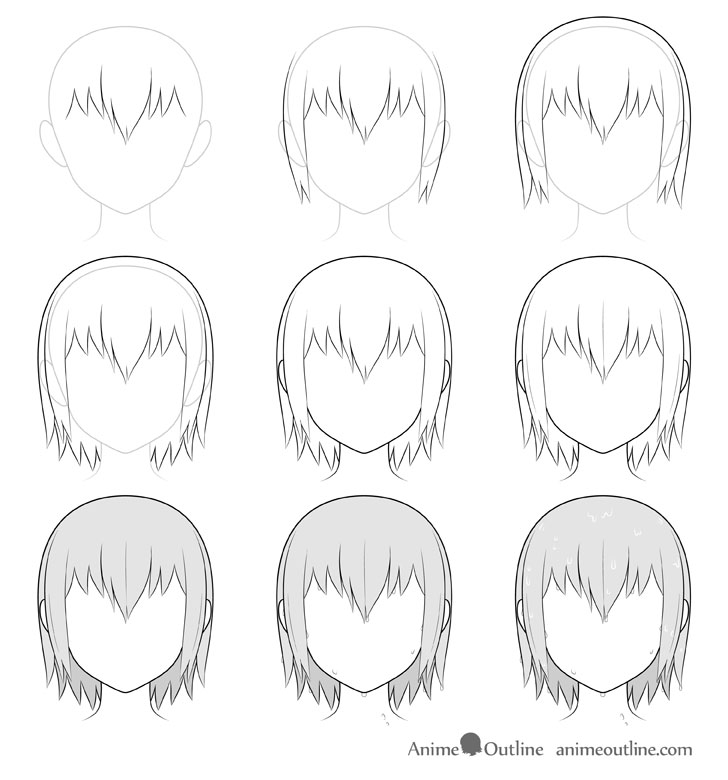
Anime and manga scenes involving rain, baths and swimming are all very likely to show wet hair. The same can be true for action scenes involving water or even a character that’s simply sweating a lot.
Though drawing wet hair is not that much difficult from drawing normal (dry) anime hair there are a few rules you can follow. These will help make the hair you’re drawing look like it’s actually wet.
Dry Anime Hair Drawing
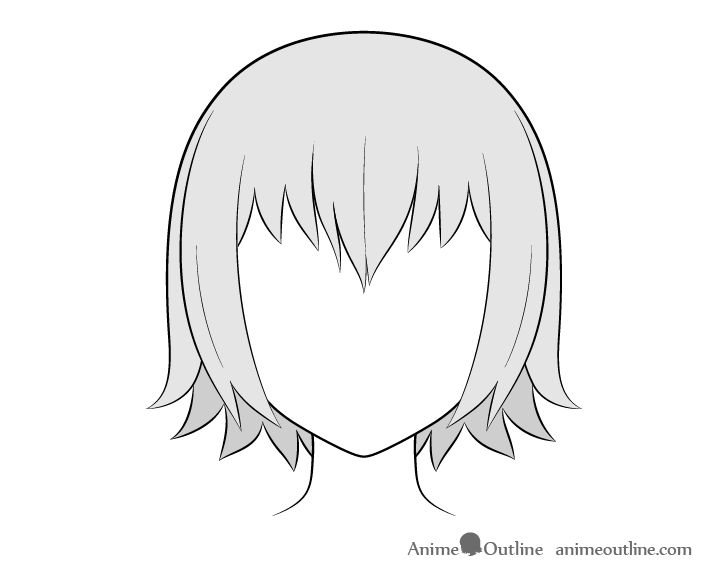
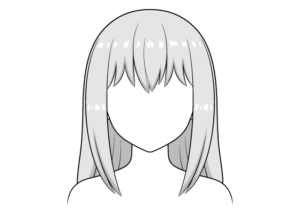
Before drawing wet hair it’s a good idea to at least estimate what the dry version of the same hair looks like. You can see the “dry” version of the hairstyle used for this tutorial above.
Though the tutorial shows only one hairstyle as the example you can apply this guide to drawing many other common anime hairstyles as well.
Specifics of Drawing Wet Hair
Generally wet hair will have less volume than dry hair. It will stick more closely to the head (pulled down by the added weight of the water). Being heavier wet hair will also tend to hang in a more downwards direction and reach further down. This of course will only be the case for hair that hangs freely. Any parts that are pulled back, rolled into buns, etc… will generally not be effected.
To help make the drawing process more manageable and to better keep track of how hair transforms when it’s wet this guide uses the approach of splitting it into several different sections.
For more on drawing hair in such a way see:
How to Draw Anime and Manga Hair – Female
Wet Anime Hair Drawing Video
Above is a quick video that shows how to draw wet anime hair line by line. The video features updated art and provides an alternative way to add the water drops along the hair’s surface. After watching it also be sure to read below for more detailed drawing instructions.
If you like videos like this one please be sure to leave a like and to subscribe to the AnimeOutline channel to help it grow.
Step 1 – Draw the Front Section of the Hair

Before drawing the hair you should make an outline drawing of the head and draw the hair overlapping over top of it. You can erase the hidden parts of the head later.
For guide to drawing the shape of an anime head see:
How to Draw an Anime Face (Structure & Proportions)
For and explanation of why you want to draw this was as well as more good drawing practices see:
Beginner Guide to Drawing Anime & Manga
Draw the front section of the hair hanging lower down on the face than normal with the individual clumps pointing more downwards to show that they are heavy with water. You can also draw the clumps closer together near their base. Doing so will make it look like the hair is sticking closer to the forehead as wet hair is likely to do.
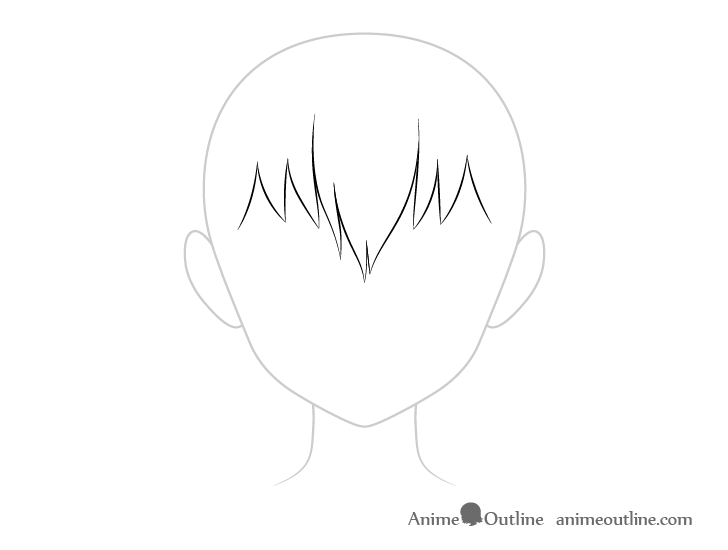
Start the drawing with the large clump hair clump in the middle and then draw the ones on the sides.
Although the example shows the hair outlined with dark lines (so that it’s easier to see) you should keep your lines light until you have all parts of the hair drawn out. This will make them easier to erase in case you have to make a correction.
Step 2 – Draw the Sideburns
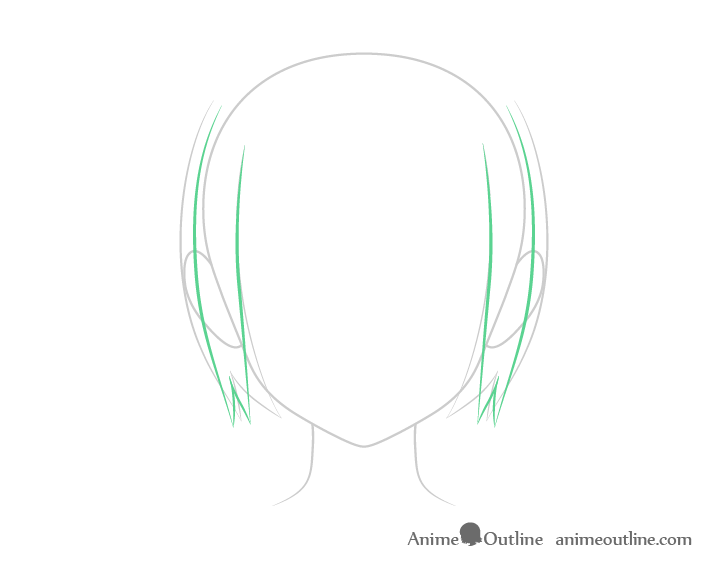
Above you can see how the wet version of the sideburns compares to the dry version. It has less volume and instead of hugging the face hangs almost straight down.
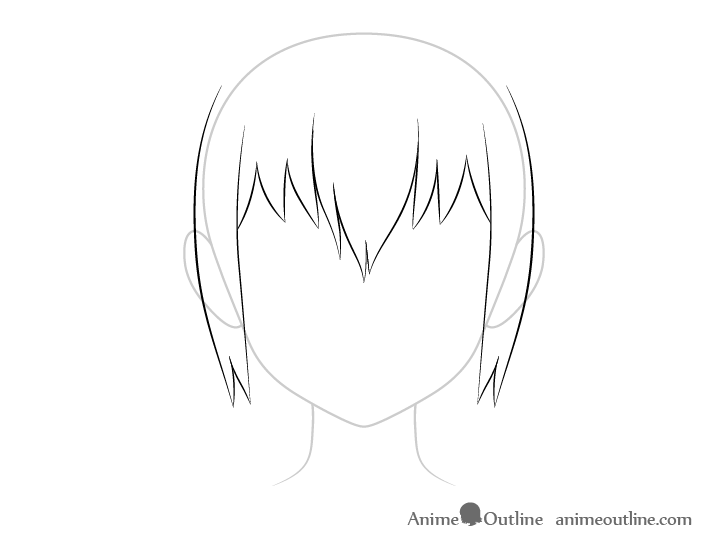
To make the changes easier to see the comparison drawing shows the sideburns on their own but your drawing should look like the examples above.
Step 3 – Drawing the Top Hair
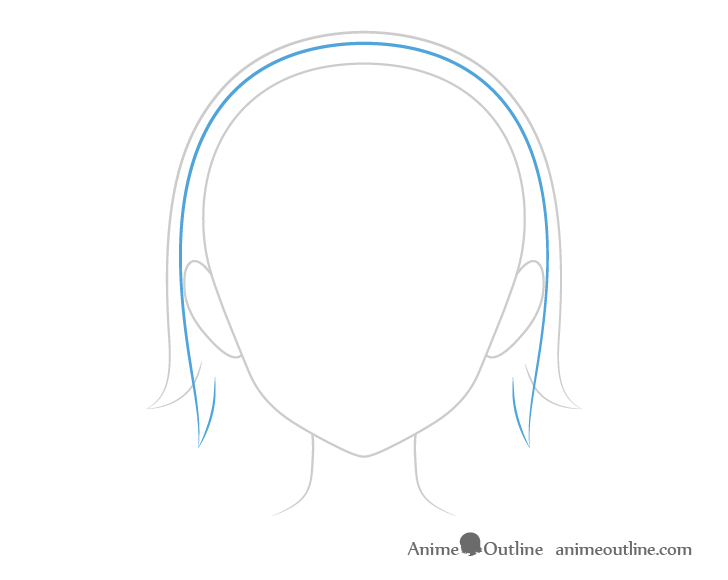
For the top part of the hair the main change is less volume. As it progresses downwards the clumps on the sides hang downwards instead of curving to the sides.
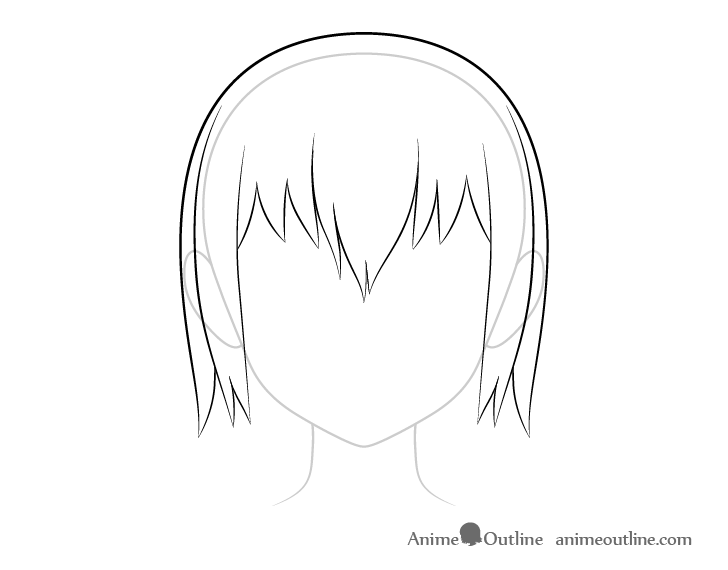
Once you’ve added this section of the hair to the drawing it should look similar to the example.
Step 4 – Drawing the Back Hair
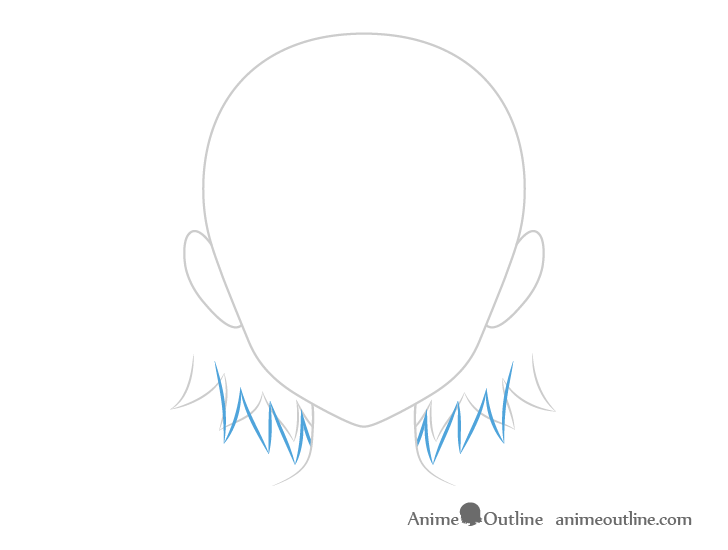
In this example the hair at the bottom/back of the head fans out when dry. When wet the clumps are narrower, closer together and hang more downwards with less of a curve in their shapes.
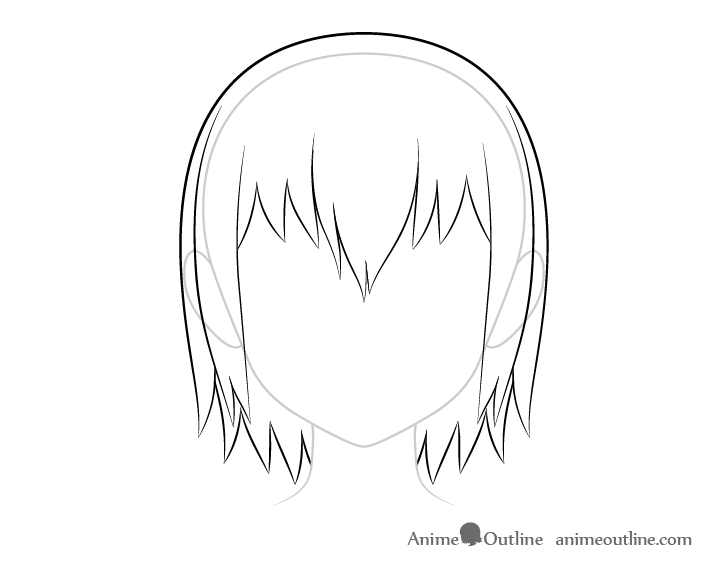
You should have a pretty much finished outline drawing of the hair once you’ve added the bottom/back section.
Step 5 – Cleaning up the Drawing

For this step you simply erase the parts of the head that are covered by the hair.
Step 6 – Drawing the Small Details of the Hair
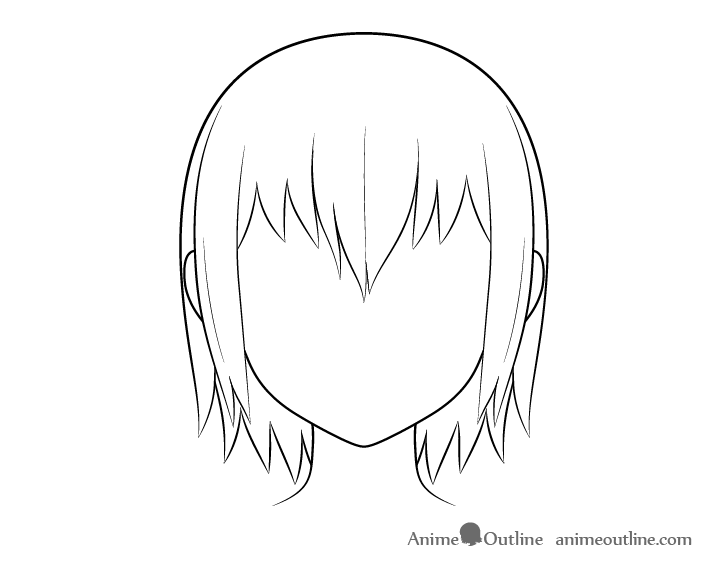
To make the hair look a bit more interesting you can add a few splits/folds into some of it’s parts. For this example there are only three (one along the large clump and one on each of the side sections). However, fore a more detailed drawing you can add more in different places.
Earlier on it was recommended that you start with light lines for the hair’s initial outline. If you’ve done so you can darken your lines by tracing over them after adding the hair folds.
Step 7 – Basic Shading
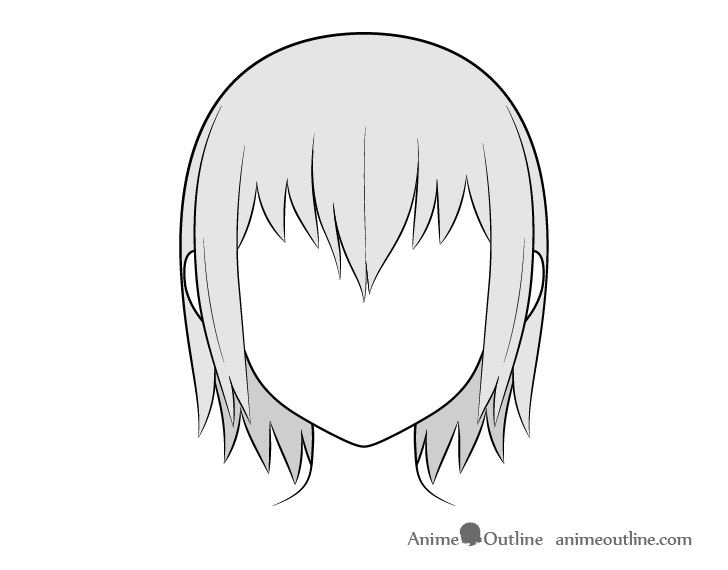
If you are going to be shading the drawing using pencil and paper you may want to see step nine before proceeding further.
For this very basic example you can just fill the hair’s entire outline with one solid shade of grey or color. Afterwards, slightly darken it’s bottom/background area.
If you also want to add highlights/reflections you can see the following tutorial for some examples:
Different Ways to Draw Anime Hair Highlights
Step 8 – Water Drops Drawing
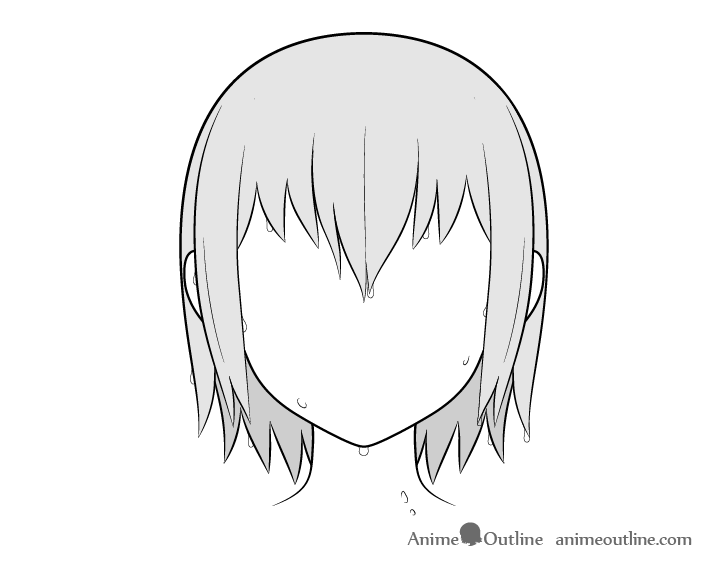
To help show that the hair is wet also add some water drops along it’s surface.
You can start with the drops that are hanging on the tips or rolling down the sides of the clumps. Make the shapes of the water drops along the tips narrower towards the top and wider towards the bottom. Draw the drops rolling down the sides similar in shape to upside down question marks.
You can also add a few drops along the face and neck. If a character has water drops in their hair they will most likely have them in those places as well.
Step 9 – Inner Water Drops Drawing (Final Step)
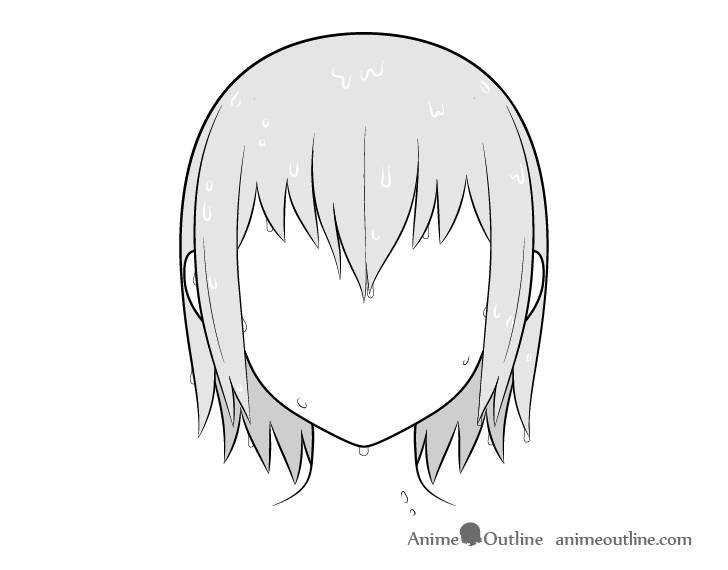
For the last part of the drawing add the water drops along the shaded/colored part of the hair. Quite often in anime and manga the outlines of these are drawn in white as otherwise they can be hard to see on darker colors. This makes them a little tricky to add if you are just drawing using pencil and paper. One thing you can do is to simply leave these areas white and shade around them. Alternatively, you can use opaque paints and thin brush or a thin white correction pen to draw the drops over top of the shading or color.
If you are drawing digitally than drawing the drops can be much easier. Depending on the software you can generally add them in a new layer over top of the color/shading.
For lighter hair colors/shading outline the drops with dark lines.
You can make the shapes of most of these drops similar to the letter “U”. You can also combine several drops together in wave like shapes. If you want to show hair that’s really soaked draw these wave shapes larger and make more of them.
Once you finish drawing all of the water drops you should have a finished drawing of wet looking anime hair.
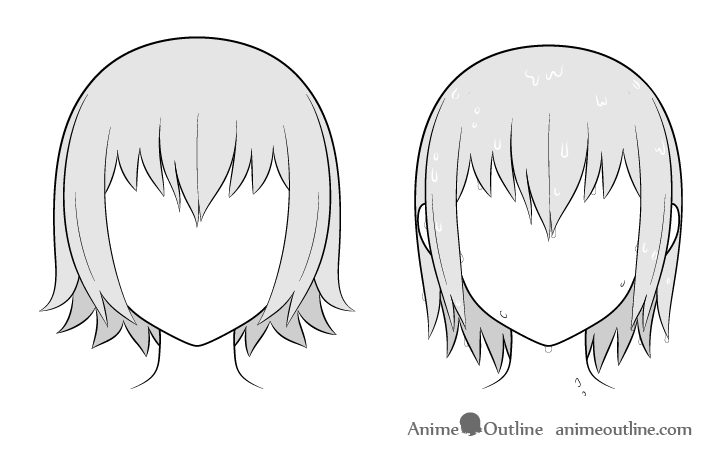
Above you can see a comparison of the wet hair next the same hair when it’s dry.
Conclusion
The steps to drawing wet anime and manga hair are not much different from drawing normal (dry) hair in the same style. The main characteristics of wet looking hair are less volume and downwards pointing hair clumps. You can also add a few water drops to further help show that the hair is wet.
For more similar tutorials see:
For more tutorials involving “water” see:
4 Ways to Draw Crying Anime Eyes

